Homemade Pineapple Candy: A Sweet Tropical Treat
Some desserts just have a way of making you feel like a kid again—bare feet sticky on the kitchen tiles, hands dusted with sugar, laughter sneaking in between bites. Homemade pineapple candy brings that feeling rushing back every single time. It isn’t the kind of treat you’ll find wrapped up on a store shelf or buried in the convenience aisle. This candy, with its sun-bright color and intense punch of sweet-tart fruitiness, is something special because it’s yours from start to finish.
There’s a ritual to making it, too. The tangy scent of fresh pineapple mixing with simmering syrup fills the whole kitchen, hinting at the sticky joy to come. It’s slow, simple work: stirring, waiting for that sugar to melt away, watching as the fruit turns glossy, then letting patience do the rest while time dries each piece. I love making a batch for a rainy Sunday or a holiday table—just the sight of those golden cubes feels festive. And if you ever want to impress someone with something both nostalgic and impossibly fresh? Trust me, this is the move.
When Homemade Pineapple Candy Becomes the Hero of Your Snack Table
There’s something utterly captivating about making homemade candy. Maybe it’s the magic of transforming simple ingredients into chewy, sun-glazed jewels, or maybe it’s just that first taste where you realize, “Wait, this is really from my own hands?” I make this pineapple candy when I’m craving something sweet but not cloying—when store-bought just won’t cut it and I want those tropical notes front and center. The reward is twofold: you end up with a snack that tastes like summer vacation and a kitchen that smells like some hidden bakery tucked along the coast.
What’s even better? Homemade pineapple candy isn’t just for dessert or special occasions. I’ve packed pieces into lunchboxes for the kids—they get pretty sticky, but the smiles are worth a little soap and water. They’re a hit at potlucks too, or alongside a cheese platter paired with something creamy and salty. And if you’re the sort who likes edible gifts, tuck a handful into a little tin with parchment and you’ll look like a pro. It’s a recipe that sneaks in those little moments of happiness, wrapped up in sweet-tart flavor and just the right amount of chew.
The Ingredients That Let This Candy Sing
- Fresh pineapple – the heart of the candy, giving it real tropical punch and juicy bite; canned pineapple just doesn’t have the same sparkle.
- Sugar – transforms everything into glossy sweetness and pulls the natural juices out of the pineapple, crucial for that sticky, chewy texture.
- Water – keeps things moving smoothly in the pan and helps dissolve the sugar into a syrup before it thickens.
- Lemon juice – sharpens the fruit flavor and keeps everything bright, never overly sweet; you can swap with lime juice for a twist.
See the recipe card below for the full list of ingredients and measurements.
Bringing the Candy to Life: Slow Simmer to Sweetness
The best thing about making homemade pineapple candy is how unfussy it really is. You won’t need cornstarch or candy thermometers—just a bit of stirring, some patience, and time.
- Start by peeling and chopping your pineapple into small, even pieces. You want every chunk to cook at the same pace and absorb as much syrup as possible.
- Set a saucepan over medium heat and pour in water, sugar, and lemon juice. Stir as the sugar dissolves completely; you’ll know you’re there once the grains vanish and everything looks glassy and clear.
- Add the pineapple pieces and watch the mixture start to bubble. Stir occasionally so every chunk gets a swirl through the syrup.
- Let the mixture gently simmer for about half an hour. The pineapple will soften, releasing flavor, and the liquid will thicken up, coating everything in a shiny glaze. Take a quick sniff—you’ll catch that lush, tangy aroma rising up from the pan.
- Once the fruit looks glossy and the syrup is noticeably thick, take the pan off the heat and let it cool a bit. You don’t want to handle molten sugar, and the fruit soaks up even more flavor as it rests.
- Line a baking sheet with parchment paper (seriously, don’t skip the parchment—this mixture is sticky) and spread out the pineapple pieces in a single layer, drizzle on any remaining syrup. Try to keep a little space around each piece for even drying.
- This is where patience sets in: leave the tray at room temperature, uncovered, for an entire day. By the end, the candy will set up into those chewy, sugar-encrusted bites.
- Once dry, use a sharp knife to cut the pieces into even squares or bite-sized chunks. Pry one free, give it a taste—you’ll see why the wait is always worth it.
Texture, Flavor, and the First Bite of Pineapple Candy
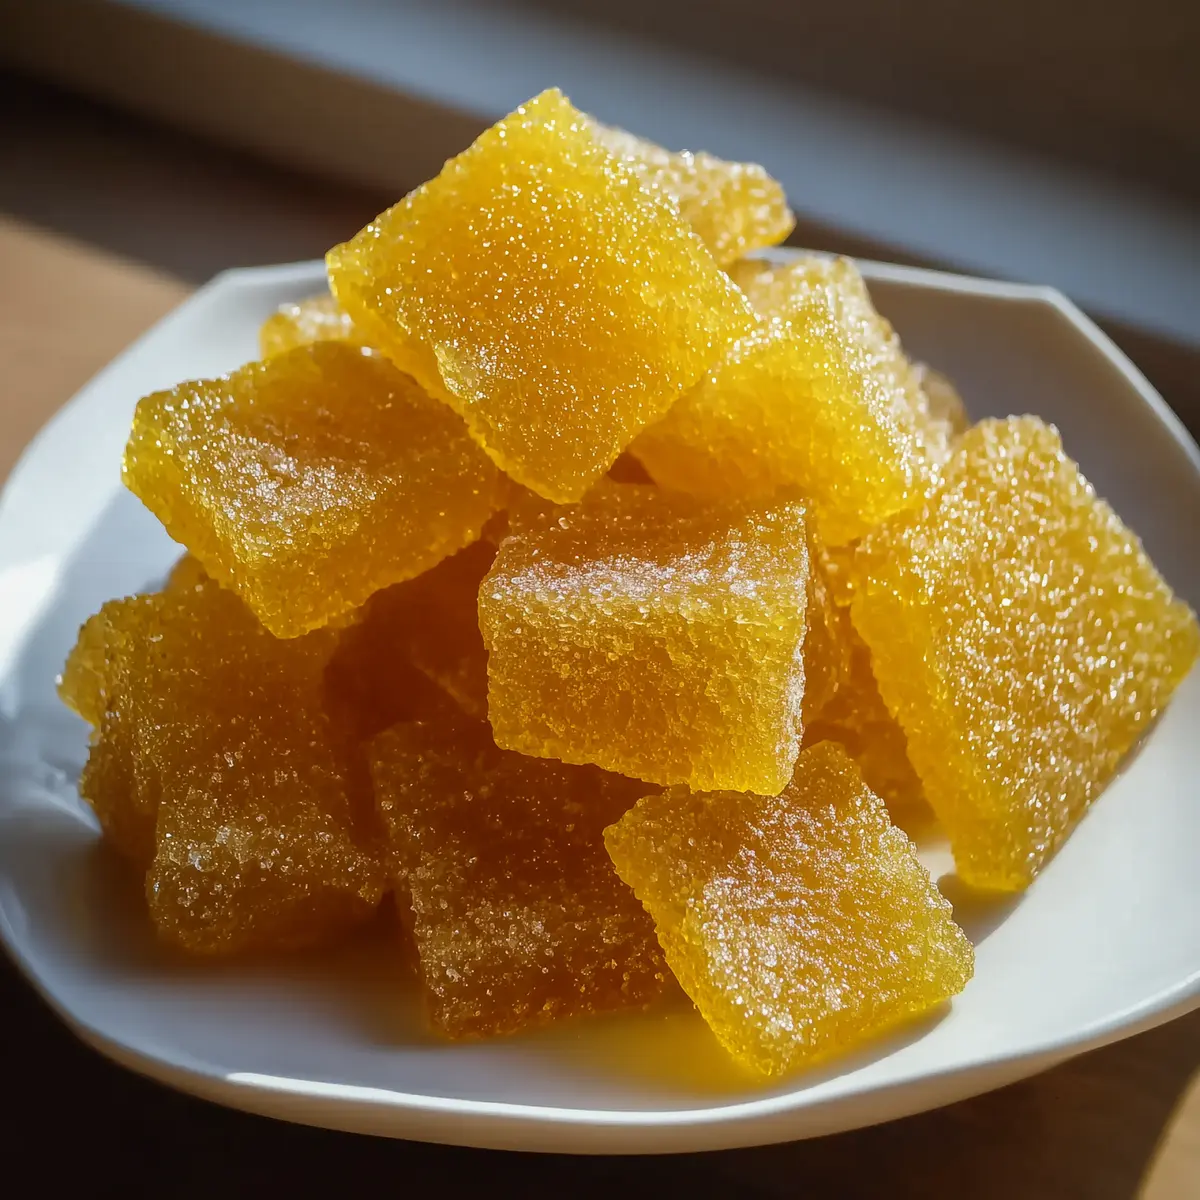
There’s not much out there that matches the combination of vibrant flavor and playful texture you get from this candy. The outside is a little tacky—sometimes even crystalized if you let it dry long enough—but the inside stays soft and chewy while still packing that juicy bite. Each piece is like a tropical escape: first you get a sharp burst of bright, tangy pineapple, then the mellow, syrupy sweetness seeps in, finishing with just a hint of citrus. I find it really satisfying to pop one in your mouth and feel the way it gives beneath your teeth, like biting into fruit gummies but in a way store-bought never quite pulls off.
And don’t be surprised if the color catches your eye every time you pass the tray. It’s a burnished gold, almost glowing under the kitchen lights, and beckoning you for just one more piece. Eat it on its own, tuck it onto a fruit board, or swirl a chunk into warm oatmeal for a hit of sunshine on a grey morning.
Tweaks, Tricks, and How to Serve Homemade Pineapple Candy
Making homemade pineapple candy works best when you play to its strengths: don’t rush the drying, let that fruit ripen fully before starting, and always use real lemon or lime for brightness. If you like a little extra sparkle, toss the finished pieces in a bit of extra sugar just before serving—this adds crunch and keeps the candy from sticking together.
Want to tweak it? Try swapping a squeeze of lime in place of lemon, or stir in a pinch of chili powder to bring some gentle heat. You can also blend some coconut extract into the syrup if you’re after a more tropical flare. Storage is pretty straightforward: keep the finished candy in an airtight jar at room temperature, separated with parchment so it doesn’t all clump up. It doesn’t last forever—though you’ll likely eat it before that’s even an issue.
As for serving, think beyond the candy dish. Scatter pieces over vanilla ice cream, gift in cellophane bags, or dice and sprinkle on yogurt for a sweet finish. I’ve even tucked a handful into picnic baskets alongside salty nuts and cheese, and watched them disappear before lunch is done.
FAQs about Homemade Pineapple Candy
How should I store homemade pineapple candy to keep it fresh?
Keep your homemade pineapple candy in an airtight container at room temperature, layering parchment or waxed paper between the pieces to prevent sticking. Avoid storing it in the fridge as extra moisture can make the candy turn sticky instead of chewy. If you live in a very humid climate, consider placing a silica gel packet (the kind used for food) in the container. Properly stored, it should stay fresh for about a week.
Can I use canned pineapple instead of fresh for this candy?
Fresh pineapple brings the best flavor and texture to this recipe, but in a pinch, you can use well-drained canned pineapple. Just be aware that canned fruit might be softer and more watery, so your candy could come out a bit less chewy and might take longer to dry. Always pat the fruit dry before starting and adjust drying time as needed.
Is it possible to freeze homemade pineapple candy for later?
Freezing isn’t recommended for this type of candy—the texture tends to suffer, turning mushy or sticky when thawed. The drying process gives homemade pineapple candy its signature chew, and freezing often disrupts that. For the longest shelf life, stick to airtight containers and make smaller batches as needed.
How can I keep homemade pineapple candy from sticking together?
After the candy is completely dry, it can still stick if left piled up. To keep things tidy, roll the finished pieces in a light dusting of granulated sugar before storing. You can also layer parchment paper between each layer in your container to keep each piece separate and easy to grab.
Homemade pineapple candy is that rare combination of playful, bold, and comforting—a little slice of sunshine you can hold in your hand and share. Every batch smells like warm summer afternoons and tastes like the real thing, not some distant cousin in a shiny wrapper. When you make it yourself, you control the flavors, the chew, and—maybe best of all—the memories that come with every bite. Whether you’re sneaking a piece after dinner or packaging up a batch for a friend, this is the kind of treat that brightens ordinary days and gives you something a little sweet to look forward to.
More Delicious Recipes
- St. Patrick’s Day Snack Board: This vibrant snack board features fresh fruits and sweet treats, perfect for serving alongside your homemade pineapple candy.
- Lucky Charms Bars: These sweet bars combine cereal and marshmallows for a chewy treat that complements the fruity acidity of your candy.
- Irish Scones: Enjoy these soft and sweet scones as a delightful pairing, offering a comforting contrast to the chewy texture of pineapple candy.
Homemade Pineapple Candy: 7 Steps to Sweet Paradise
Ingredients
Equipment
Method
- Combine water, sugar, and lemon juice in a saucepan over medium heat.
- Stir until sugar dissolves completely.
- Add pineapple pieces to the saucepan.
- Cook on medium heat for 30 minutes, stirring occasionally.
- Remove from heat and let cool.
- Spread the mixture on a baking sheet lined with parchment paper.
- Let it dry for 24 hours at room temperature.
- Cut into pieces and enjoy.