Cool Whip Candy: A No-Bake Dessert Delight
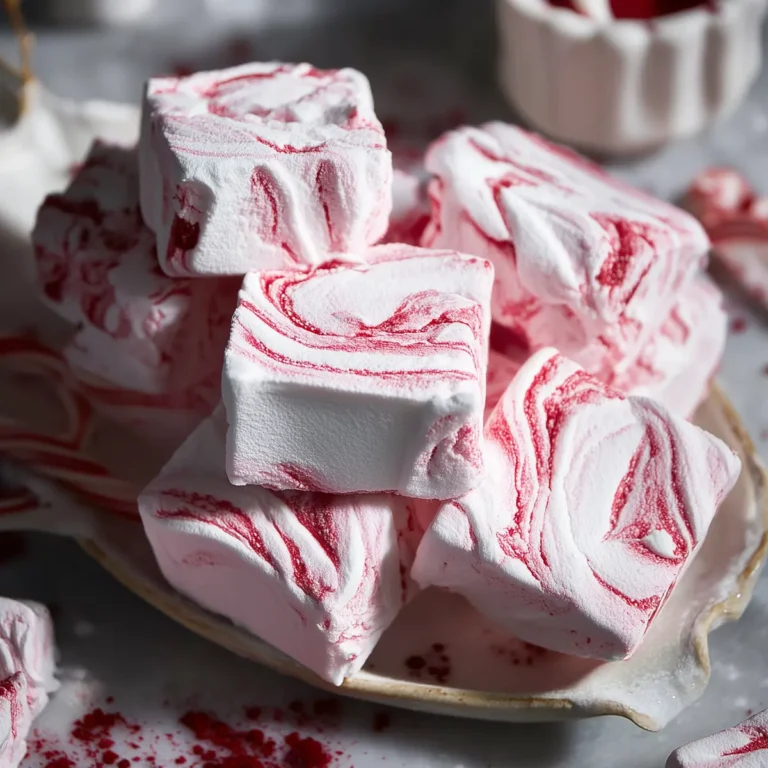
When the weather is just warm enough to make turning on the oven feel like a chore, but you still find yourself craving something a little indulgent and sweet, Cool Whip Candy is the move. I first stumbled on this treat late one Friday night—combining pantry basics to fight off a chocolate craving—and it’s since become my top no-bake dessert for last-minute gatherings and lazy afternoons alike. Each bite is creamy, pillowy, and just a touch nostalgic, reminding me of the whipped desserts from childhood potlucks, only now made bite-sized and dangerously easy to eat. The best part? You barely have to plan ahead, and the flavor possibilities are almost endless depending on your pudding choice. There’s something magical about the contrast between the sugar-dusted outside and that melt-in-your-mouth interior—sweet, soft, and totally satisfying.
What Makes This Cool Whip Candy So Irresistible
There’s something deeply comforting about desserts that come together with barely any effort, but Cool Whip Candy somehow manages to strike the perfect balance between simplicity and a little bit of magic. Unlike heavy, rich fudge or sticky caramels, these candies are light as clouds, melting the moment they hit your tongue. The creamy base, just sweet enough, is brightened up by a hit of vanilla—while the fun of picking your favorite pudding flavor is half the adventure. Whether you shape them in perfect little rounds or let them be a bit rustic, each piece gets a toss in powdered sugar for that delicate “snowy” finish. They’re ideal for sharing (though a few always seem to disappear from the tray before guests arrive).
The Ingredients That Make Cool Whip Candy Shine
Building beautiful Cool Whip Candy takes only a handful of pantry and fridge staples, but each one plays a key role:
- Cool Whip (thawed) – This whipped topping does the heavy lifting, giving the candies their iconic light, fluffy texture. Let it thaw in the fridge for best results—trying to mix straight from the freezer just won’t cut it.
- Instant pudding mix – Pudding powder acts as both flavor and structure here. Chocolate, vanilla, or even pistachio… each brings a new twist and subtle color.
- sugar (powdered) – Essential for sweetness and for rolling the candies, this ingredient keeps the outside delicate and prevents stickiness.
- Vanilla extract – Rounds out the flavor and amps up that “bakery treat” vibe in every bite, especially if you go for a classic pudding base.
See the recipe card below for the full list of ingredients and measurements.
Bringing This Cool Whip Candy Together Step by Step
Think of making Cool Whip Candy as more of a kitchen craft than a baking project—the kind you can do with kids or solo, no oven or fancy tools required.
- In a mixing bowl, fold together the thawed Cool Whip and dry instant pudding mix until you’ve got a silky, uniform base. It should smell incredible already—whipped, sweet, and fragrant.
- Stir in a splash of vanilla extract. Then, gradually sift in your powdered sugar, mixing gently to avoid lumps. The mixture will start off soft and sticky, but as you work in the sugar, it’ll transform into a thick, malleable dough that comes away from the sides of the bowl.
- Cover and let it chill in the fridge for at least a half hour—this resting time is what makes the dough firm up enough to roll. Don’t skip it, or you’ll find things a bit too messy to handle.
- Once chilled, line a tray with parchment. Scoop out small dollops of the mixture (a spoon or a cookie scoop both work) and gently roll them between your palms for smooth, round candies.
- Drop each piece into more powdered sugar, rolling until completely coated. The sugar should cling lightly, giving each candy its classic sweet-and-dusty finish.
- Chill on the tray for a final 15–20 minutes before serving. This little rest makes sure the candies set up and hold their irresistible, creamy texture.
Getting That Perfectly Creamy Center and Sweet Powdered Sugar Shell
The secret to nailing the texture with Cool Whip Candy is all in the chilling and gentle handling. Rushing the chilling process will leave you battling a sticky mess instead of easily forming those pillowy bites. For that ultra-creamy inside, let the mixture get fully cold—don’t be afraid to chill it on the longer end—then work quickly with cool hands. The finishing roll in powdered sugar isn’t just for looks: it gives each piece just enough resistance on the outside before your teeth hit the soft, dreamy middle. If you find your candies absorbing too much of the sugar coating as they sit, give them a second toss just before serving for that perfect “freshly made” look.
Tips, Variations, and How to Serve Cool Whip Candy
If you love to tinker, this recipe is your playground. Swap chocolate pudding for butterscotch, try adding a pinch of instant espresso powder for a mocha kick, or fold in chopped nuts for a little crunch. For a festive batch, roll finished candies in colored sprinkles instead of powdered sugar, or dust with cocoa for a richer twist. Store Cool Whip Candy in an airtight container in the fridge: these candies are at their best cold and creamy, but they’ll hold their shape on a dessert table for a couple of hours. If you want to make them ahead, you can even freeze finished candies—just bring them to fridge temp before serving so the centers stay soft, not icy. I love piling them on a platter beside coffee and fruit for family movie night, or slipping a few into a lunchbox as a midday pick-me-up.
FAQs about Cool Whip Candy
Can I use homemade whipped cream instead of Cool Whip?
Homemade whipped cream doesn’t have the stabilizers found in Cool Whip, so the texture will be softer and may not hold as well. If you try it, be sure to whip your cream to stiff peaks and chill the candies well before serving.
Is it possible to make Cool Whip Candy ahead of time?
Absolutely—you can prep and roll the candies up to two days in advance. Store them chilled in a container, but consider rolling in a fresh layer of powdered sugar before serving if the coating dissolves a bit with time.
How long does Cool Whip Candy last in the fridge?
Kept cold in an airtight container, these candies stay delicious and creamy for about five days. Their pillow-soft texture is best enjoyed within the first couple days, but if you’re planning parties, don’t be afraid to make them the night before.
Can you freeze Cool Whip Candy for longer storage?
Yes, Cool Whip Candy freezes nicely. Arrange them in a single layer and freeze until solid, then store in a bag or container with parchment between layers. Thaw in the fridge before serving so the centers become creamy again.
What if I want to make Cool Whip Candy with a different flavor?
Just switch up the instant pudding flavor—it’s that easy. Chocolate, vanilla, lemon, pistachio, or even coconut all work beautifully, letting you match the candies to any season or craving.
There’s something almost therapeutic about making (and sneaking!) these little Cool Whip Candy bites from the fridge—soft, snowy, and wonderfully sweet. Whether you share them as a quick party nibble or keep a hidden stash for after-dinner cravings, they’re the fuss-free treat you’ll reach for every time the sweet tooth strikes.
More Delicious Recipes
- Lucky Charms Bars: These sweet, no-bake bars are perfect for satisfying a sweet tooth, just like Cool Whip Candy.
- St. Patrick’s Day Brownie Trifle: This layered dessert adds a fun twist with rich brownies, making it a delightful option for gatherings.
- St. Patrick’s Day Lucky Chow: A tasty and quick treat that offers a similar sweet crunch as the candy, ideal for sharing at parties.
Cool Whip Candy
Ingredients
Equipment
Method
- Combine thawed Cool Whip and instant pudding mix in a medium or large mixing bowl until smooth and creamy.
- Add vanilla extract and gradually incorporate powdered sugar until a soft, slightly stiff dough forms.
- Cover the bowl and chill the mixture in the refrigerator for 30-60 minutes, or until firm enough to handle.
- Line a baking sheet with parchment paper. Using a small scoop or tablespoon, portion out small balls of the chilled mixture.
- Roll each portion between your hands to form smooth balls and place on the parchment-lined sheet.
- Roll each candy in additional powdered sugar for an even coating.
- Return to the refrigerator to set for 15-20 minutes before serving.