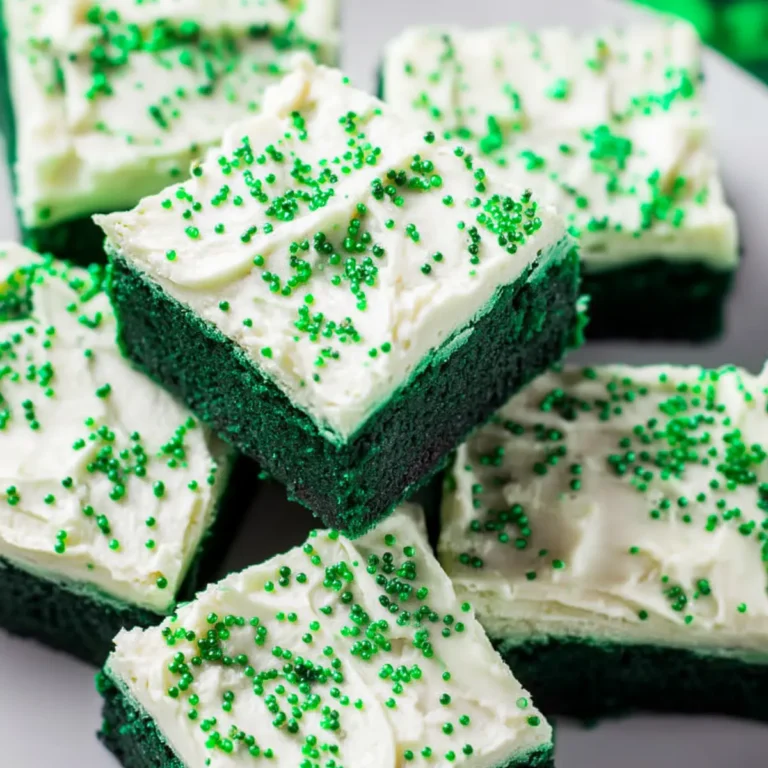
St. Patrick’s Day Mint Blossom Cookies Perfect for Celebrations
If you’ve been looking for a dessert that absolutely screams celebration, St. Patrick’s Day Mint Blossom Cookies might just be the burst of green magic your table is missing. That fresh minty scent wafting up as the cookies bake? It’ll fill your kitchen with pure holiday spirit, and the chocolate center—melty and rich—pulls everyone in for a second bite. These cookies aren’t fussy, but they feel playful and special, just right for making March feel a little sweeter (and greener).
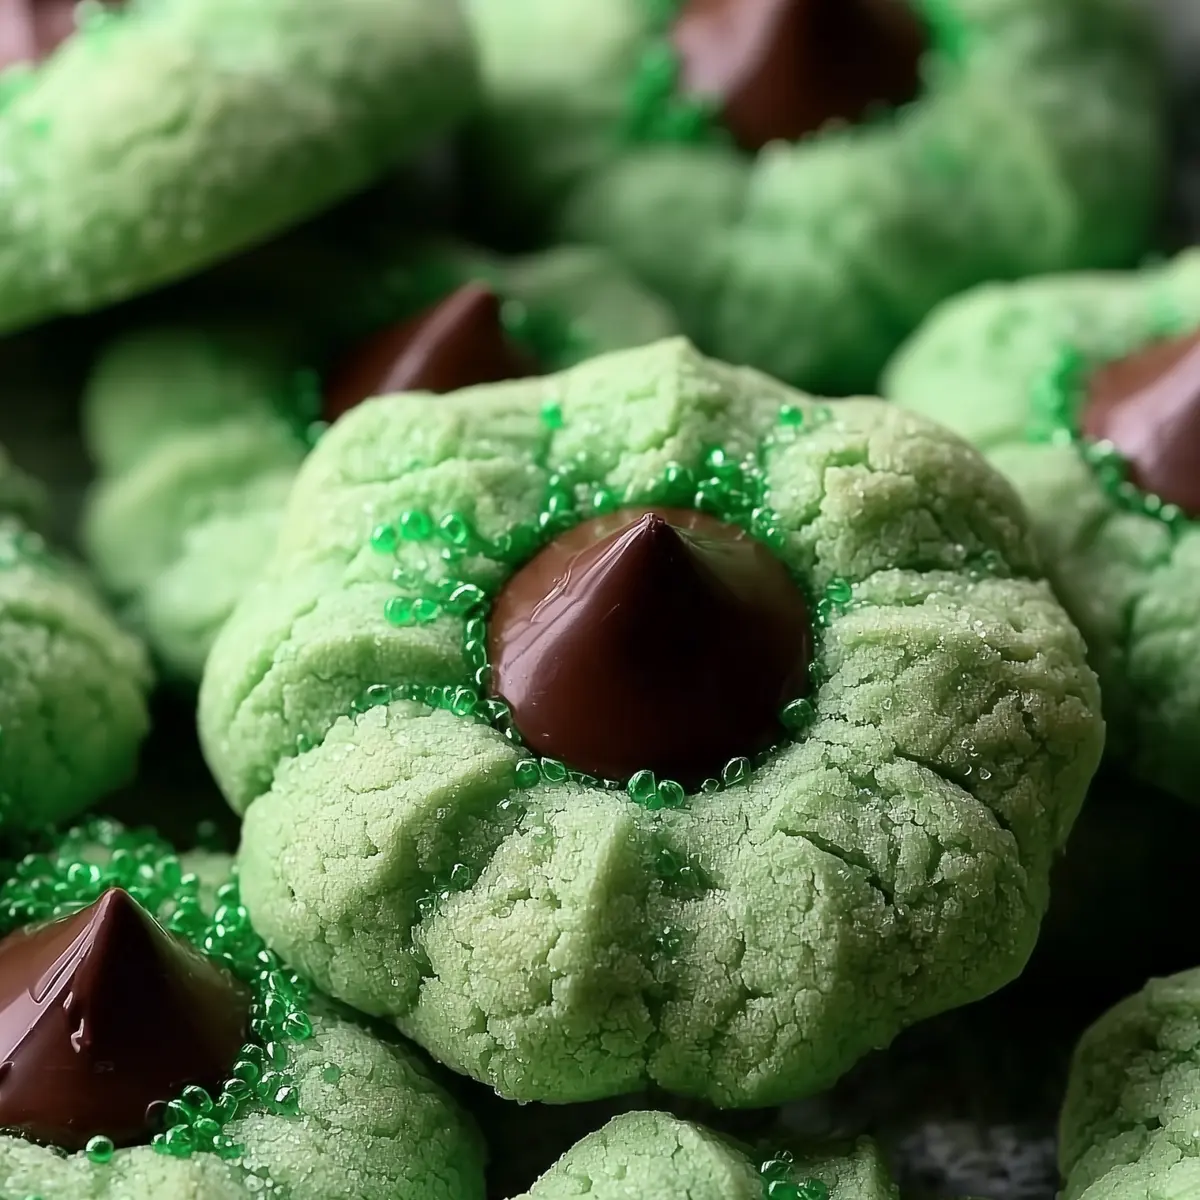
Baking them has become a favorite ritual around here. You get buttery, pillowy cookies with a pop of peppermint, rolled in sparkly green sugar, and when that chocolate kiss melts into the center? It’s pure joy, especially with a mug of coffee (or the first cup of tea on a chilly afternoon). The only trouble is keeping enough on the cooling rack for sharing.
Why St. Patrick’s Day Mint Blossom Cookies Are So Loved
What makes St. Patrick’s Day Mint Blossom Cookies such a standout for the holiday (or anytime you crave a burst of mint and chocolate) is how they balance playful, festive looks with melt-in-your-mouth comfort. These aren’t just any sugar cookies—they get a cool lift from peppermint extract, a gentle crunch from bright green sanding sugar, and a glossy pop of chocolate right in the middle. The buttery cookie underneath is soft and chewy, never crumbly or dry.
Blossom cookies are a classic at cookie swaps and school parties, but their shamrock-green style feels tailor-made for St. Patrick’s Day. It’s the kind of treat that genuinely makes people smile—perfect for anyone who wants to mark the occasion with a touch of whimsy and some childhood nostalgia. Plus, these are easy to bake in a big batch, and the colors stand out on any dessert tray. Expect them to disappear faster than you can say “luck of the Irish.”
Ingredients That Make Mint Blossom Cookies Perfect for St. Patrick’s Day
Every great cookie starts with a handful of simple, quality ingredients. Here’s what gives these mint blossom cookies their signature taste and look:
- Flour – Provides structure and chew; an all-purpose staple in classic cookies.
- Baking soda – Ensures a gentle rise and soft texture in each batch.
- Baking powder – Adds just a touch more lift for lighter, cakier cookies.
- Fine sea salt – Enhances sweetness and keeps the flavors in balance.
- Unsalted butter – The creamy backbone that makes the cookies rich and tender.
- Granulated sugar – Adds sweetness and helps the edges crisp up beautifully.
- Light brown sugar – Brings a mellow, caramelly depth to the dough.
- Eggs – Bind everything together and give the cookies their soft, chewy texture.
- Peppermint extract – The star flavor; bright, refreshing, and instantly festive.
- Vanilla extract – Adds warmth and rounds out the minty notes.
- Green gel food coloring (optional) – Your shortcut to that eye-popping, true emerald green that feels just right for March celebrations. Skip if you want a more natural look!
- Granulated sugar (for rolling) – Lets the sanding sugar stick and gives extra sparkle.
- Green sanding sugar or colored sugar – Delivers crunch and a no-fuss, festive finish.
- Dark chocolate kisses or chocolate candies – The classic blossom center: rich, bittersweet, and a perfect contrast to mint.
See the recipe card below for the full list of ingredients and measurements.
Step-by-Step: How to Make St. Patrick’s Day Mint Blossom Cookies
Mixing and baking these cookies is easy, even if you’re juggling little ones or multitasking your way through a party prep. Here’s how it goes:
- Whisk together the flour, baking soda, baking powder, and fine sea salt in a medium mixing bowl—no lumps, just a soft, powdery blend. Set that aside for now.
- Cream the unsalted butter in a separate bowl until smooth and creamy. Add the granulated sugar and light brown sugar, then beat until the mixture is noticeably lighter, almost fluffy. You’ll know it’s right when it looks a bit like a cloud.
- Beat in the eggs one at a time, blending well after each so the dough stays silky. Pour in the peppermint and vanilla extracts, stirring just enough to combine and even out the aromas.
- If you want that vibrant green color, gently mix in a little green gel food coloring. Keep going until the dough is evenly tinted—think bright spring grass.
- Slowly add the dry ingredient blend to your wet mixture. Mix only until the dough comes together and all the flour is worked in. Don’t overdo it—the less you stir at this point, the softer your cookies stay.
- Cover the dough with wrap or a lid and stash it in the fridge. Chilling helps the cookies hold their shape and develop those classic, bakery-style edges.
- Scoop out bits of dough—about the size of a big marble—and roll each ball gently between your palms. Now roll each dough ball in granulated sugar, then in green sanding sugar, until every side sparkles.
- Arrange the sugar-rolled balls on your prepared baking sheet, leaving room for gentle spreading. Bake until the edges are lightly golden and just starting to set. The centers should puff but look soft.
- Let the cookies rest right on the baking sheet for a few minutes (they’ll be delicate right out of the oven). Press a single dark chocolate kiss or chocolate candy into the center of each, just pressing enough so it sinks partway in.
- Allow the finished cookies to cool fully before moving or stacking. The chocolate needs a little time to set up so it stays glossy and holds its shape.
Pro Tips for Irresistible Mint Blossom Cookies Every Time
Let’s be real—sometimes you just want your cookies to come out bakery-perfect without stressing about tiny details. Over the years, a few easy tricks have saved me more than once with these St. Patrick’s Day Mint Blossom Cookies.
If your dough seems sticky or wants to spread too much, pop it back in the fridge for a quick chill. Colder dough means rounder, thicker cookies every time. When adding green gel food coloring, start slow: a little goes a long way for that vibrant hue. If you love a pronounced peppermint flavor, don’t go overboard—peppermint extract can quickly shift from refreshing to toothpaste-y if you add too much.
Don’t skip rolling your dough balls in both granulated and colored sugar. That double coat is what creates the signature crunch and sparkle. It’s tempting to press the chocolate centers in right away, but if you let the cookies rest a few minutes first, the shape will stay neat and the candy won’t sink too far. And if you’re storing the cookies for later, make sure they are completely cool first, or you’ll end up with melted chocolate smears.
For leftovers, stack them gently in an airtight tin separated by parchment—you’ll keep both the cookie’s softness and the chocolate’s sheen for days.
Fun Variations and How to Serve These Lucky Mint Blossoms
The beauty of mint blossom cookies is how easily they can fit any party—or just your mood—without losing their charm. Want a slightly different flavor? Trade peppermint extract for spearmint, or blend in a little almond for an unexpected twist. If you don’t have green gel food coloring on hand, you can skip it or swirl in just a touch for a subtle pastel look.
Cocoa lovers can use milk chocolate or even white chocolate kisses for a sweeter, creamier center. For an adults-only spin, add a splash of crème de menthe instead of peppermint extract (keep the amount small; it’s potent stuff). If kids are helping, let them sprinkle extra colored sugar or add edible gold stars for max St. Patrick’s Day bling.
Serving them is as simple as piling them high on a festive platter or nestling them into cupcake liners for easy pick-up at parties. These cookies also pair up beautifully with Irish coffee, hot chocolate, or a big mug of breakfast tea. Want to bake ahead? You can freeze the unbaked, sugar-rolled dough balls and bake straight from the freezer—it just takes an extra minute or two.
Folks love bringing a tray of these to school parties, office lunchrooms, or potlucks. They always spark conversation (and sticky fingers).
FAQs about St. Patrick’s Day Mint Blossom Cookies
Can I make St. Patrick’s Day Mint Blossom Cookies ahead of time?
Absolutely! You can make the dough in advance and let it chill in the fridge for a day or two. If you’d rather get the baking out of the way, the finished cookies stay soft for several days when kept in an airtight container, making them a handy make-ahead option for busy hosts.
What should I do if I don’t have green sanding sugar for mint blossom cookies?
No green sanding sugar? No problem. You can use regular granulated sugar for rolling, or try making your own colored sugar by mixing a tiny bit of gel food coloring into a bowl of sugar until you get a shade you like. The look will be slightly less glittery, but the cookies will still be delicious and festive.
Can I freeze mint blossom cookie dough or finished cookies?
You can freeze both! For prep-ahead ease, freeze dough balls after rolling in sugar (before baking). Just place them in a single layer in a container or bag, then bake straight from the freezer—just allow a bit of extra time in the oven. Baked cookies freeze well too, though the chocolate may lose its sheen after thawing.
What’s the best way to store St. Patrick’s Day Mint Blossom Cookies so they stay fresh?
Once completely cool, layer the cookies in an airtight container with parchment paper between stacks to protect the chocolate centers. Keep the container at cool room temperature. They’ll stay soft and minty-fresh for several days—though they’re unlikely to last that long.
If you’re looking for a treat that feels festive but isn’t a hassle, St. Patrick’s Day Mint Blossom Cookies hit the mark every time. The combination of buttery base, cool peppermint, and silky chocolate is just irresistible—plus, that green sparkle turns any gathering into a party. Pile them on a plate, pour a cup of something cozy, and let the good luck roll.
More Delicious Recipes
- Irish Shortbread: If you love buttery sweetness, these cookies offer a delightful alternative with their rich, melt-in-your-mouth texture.
- Irish Scones: Perfect for a cozy tea time, these scones add a delightful twist to your afternoon celebrations with a touch of sweetness.
- Irish Beef Stew: For a complete St. Patrick’s Day celebration, this hearty stew pairs beautifully with your sweet treats for a comforting meal.
St. Patrick's Day Mint Blossom Cookies
Ingredients
Method
- Whisk together flour, baking soda, baking powder, and salt in a medium bowl. Set aside.
- Cream butter until smooth, then add granulated sugar and brown sugar. Beat until light and fluffy.
- Add eggs one at a time, mixing well after each. Add peppermint extract and vanilla extract and mix briefly.
- If using, mix in green gel food coloring until evenly tinted.
- Gradually add dry ingredients to wet ingredients, mixing just until combined.
- Cover dough and refrigerate for at least 30 minutes to prevent spreading.
- Roll dough into 1-tablespoon balls and roll in green sugar until fully coated.
- Bake at 350°F (175°C) for 9–11 minutes until edges are set and lightly golden.
- Let cookies cool on the baking sheet for 2–3 minutes, then press one chocolate piece into the center of each cookie.
- Allow cookies to cool completely before transferring or storing.