Italian Easter Bread with Anise: A Festive Delight
There’s something magical about the way the scent of anise fills your kitchen when you bake Italian Easter Bread with Anise. This soft, semi-sweet bread, finished with a creamy anise-flavored icing and a sprinkle of colorful nonpareils, captures everything joyful about an Easter gathering. Whether you grew up savoring slices alongside family or you’re just discovering this festive tradition, you’re in for a treat that’s both comforting and full of springtime celebration.
This recipe is classic Italian-American baking at its best—tender, decorative, and simple enough to make at home. If you love breads with soft crumb, a gentle hint of licorice sweetness, and a gorgeous, glossy icing, you’ll want to pull out your mixing bowl and make this a centerpiece of your Easter table.

Why Italian Easter Bread with Anise Belongs on Your Table
There’s something so joyful about making Italian Easter Bread with Anise—it’s one of those bakes that just feels like a celebration from the very first step. The sweet scent of anise wafting through your kitchen signals the start of spring and brings generations of tradition to your modern table. It’s a recipe that rewards your effort with a wonderfully soft, slightly sweet bread crowned with glossy icing and colorful sprinkles.
This bread isn’t just about flavor; it’s about sharing a slice of nostalgia. Breaking off a twist of this festive loaf with family and friends—especially when the icing is still a bit gooey—makes breakfast or dessert feel special. And don’t be fooled: despite its decorative swirl and delicate crumb, the process is simple enough for even a first-time baker. Once you’ve tried it, you’ll want to return to this recipe year after year.
Baking Up Memories: Essential Tools for Easter Bread
You don’t need a cabinet full of gadgets to make a beautiful, soft Italian Easter Bread with Anise. Here’s what you’ll want on hand:
- Large mixing bowl – for combining dry and wet ingredients with plenty of room for the dough to rise.
- Wooden spoon – sturdy enough to stir together the thick, sticky mixture as you build the dough.
- Measuring cups and spoons – for precise amounts, especially with yeast and flavourings.
- Small saucepan – perfect for gently heating your milk and anise extract.
- Stand mixer with dough hook (optional) – this takes the effort out of kneading, but you can knead by hand on a floured surface.
- Baking sheet – greased or sprayed, ready to hold your twisted dough for rising and baking.
- Pastry brush – for giving the risen dough a golden sheen with a light egg wash before baking.
- Small bowl – just the thing for whipping up your sweet anise icing.
- Kitchen towel – ideal for gently covering the dough as it rises, keeping in the warmth and moisture.
That’s really all you need—no fancy machines required, just the basics to create something memorable.
Ingredients That Make Italian Easter Bread Special
- flour – the base of the bread, giving it lightness and structure. You’ll want all purpose for a tender texture.
- Rapid Rise yeast – for that lift and airiness that makes each slice pillowy, and lets you skip a long proof.
- Salt – a pinch balances out the sweetness and intensifies the flavors.
- Granulated sugar – gently sweetens both the dough and icing, just enough without being overpowering.
- Milk – adds moisture and a softness you can taste in every bite.
- Anise extract – brings that signature, delicate licorice flavor that sets this bread apart.
- Eggs – give richness and color to the crumb, with one reserved for that shiny, golden glaze.
- Butter, softened – adds tenderness and buttery depth without feeling heavy.
- Powdered sugar – creates a luscious, smooth icing that drizzles over the cooled bread.
- Milk (for icing) – thins the icing to just the right consistency for drizzling.
- Nonpareils – those classic, colorful sprinkles add festive crunch and bring every bite alive with childhood wonder.
See the recipe card below for the full list of ingredients and measurements.
Step-by-Step: How to Bake Classic Easter Bread with Anise
- Mix the dry base: In a large mixing bowl, combine one cup of all-purpose flour, the Rapid Rise yeast, salt, and granulated sugar. Stir well—the aroma at this stage is subtle, but you’ll start to sense it building.
- Warm the milk with anise: In a small saucepan, gently heat the milk with the first teaspoon of anise extract. Stop once the edges begin to bubble—a gentle warmth (about 43°C) maximizes yeast activation without killing it.
- Combine wet and dry: Pour the warm, fragrant milk into the dry mixture. Stir until just combined. The mixture will be sticky and lumpy, but that’s exactly right.
- Add richness: Mix in the softened butter. Then, add two of the eggs, one at a time, stirring fully between each. Reserve the third egg for glazing later. Add the remaining flour and stir again until a shaggy dough forms and starts to pull away from the sides.
- Knead the dough: Tip the dough onto a lightly floured surface. Knead by hand for 7–8 minutes, or use a mixer with a dough hook. The dough should become smooth, elastic, and springy—if it’s too sticky, sprinkle in a little extra flour as needed.
- Rest and first rise: Cover the dough with a kitchen towel. Set aside for about 10 minutes in a warm place. It won’t rise much yet (especially if your kitchen is cool), but this quick nap gives it bounce.
- Shape the loaf: Divide the dough into two equal balls. Roll each into a thick rope, about 5 cm thick and 35–45 cm long. The dough might feel a little tacky, but don’t over-flour; that’s what keeps it pillowy-soft.
- Twist and set: Place the two ropes side by side on a greased or sprayed baking sheet. Overlap them to form a twist, pinching and tucking the ends underneath for a neat finish. It’ll look rustic and homey at this stage.
- Second rise: Cover with your kitchen towel and let stand for about one hour, or place in the oven on a proofing/bread-proof setting if available. The loaf should nearly double in size. It should feel supple and airy when gently pressed.
- Preheat and glaze: While dough rises, preheat your oven to 175°C. Whisk the reserved egg, then brush it liberally over the risen loaf—this step gives you that classic, shiny finish.
- Bake to perfection: Bake for 20–25 minutes. The bread is done when it’s deeply golden and slightly springy on top. If the top begins to over-brown, lay a piece of foil loosely on top for the last 10 minutes.
- Prepare the icing: While the bread cools slightly, whisk together powdered sugar, a splash of milk, and a teaspoon of anise extract in a small bowl. You want a smooth, pourable glaze—add milk drop by drop until you get a drizzle-able consistency.
- Finish and decorate: After letting the bread rest for 5 minutes, pour the anise icing over the warm loaf so it drips beautifully down the sides. While the icing is still soft, shower with nonpareils for a colorful, crunchy topping.
Tips, Troubleshooting, and Common Mistakes for Easter Bakers
Baking Italian Easter Bread with Anise is straightforward, but even seasoned bakers run into the occasional hiccup. Here’s how to keep your loaf soft, airy, and picture-perfect:
- Dough too sticky? Add flour a tablespoon at a time while kneading, but don’t overdo it—you want a tacky, flexible texture. Adding too much will dry out the bread.
- Bread not rising? Make sure your milk isn’t too hot, or it will kill the yeast. Aim for very warm, not scalding (about body temperature). Give the dough time in a draft-free, warm spot—if your kitchen’s cool, the oven’s proof setting is brilliant.
- Crumb too dense? Under-kneading or rushing the proof can make bread heavy. Knead until elastic and let it fully double in size before baking for that signature light crumb.
- Top browning too quickly? Lay a loose piece of foil over the bread during the last 10 minutes of baking. This protects the icing-perfect top from scorching.
- Icing running off? Make sure the bread is just barely warm before drizzling with icing. Too hot and the icing will melt right off; too cool and it won’t spread as nicely.
There’s something about seeing your loaf transform from a lumpy dough to a golden celebration bread that’s a little bit magical. If your first loaf isn’t perfect, don’t worry—every homemade twist is unique!
Pairing Ideas and Festive Variations for Italian Easter Bread
Italian Easter Bread with Anise shines brightest on a holiday table, but its subtle sweetness and soft texture mean it’s welcome all spring and beyond. Here’s how to serve and switch things up:
- Morning treat: Enjoy slices for breakfast with good coffee or a foamy cappuccino—that hint of anise pairs beautifully with milky drinks.
- Easter brunch: Serve alongside savory egg bakes, frittatas, or even a tangy salad. Its sweetness makes a lovely counterpoint to salty or rich dishes.
- Dessert option: Lightly toast leftover slices and serve with vanilla ice cream, or use as the base for a spring-themed bread pudding.
- Add orange or lemon zest: For a citrusy lift, knead a little zest into the dough before shaping.
- Change up the sprinkles: Swap classic nonpareils for pastel sugar pearls or leave unadorned for a rustic look.
- Make it kid-friendly: Sub in vanilla extract for the anise if your crowd prefers milder flavors.
This bread truly invites creativity—make it your own, and let those springtime flavors shine.
FAQs about Italian Easter Bread with Anise
How should I store leftover Italian Easter Bread with Anise?
Wrap the cooled bread tightly in plastic wrap or foil and store at room temperature for up to two days. For longer freshness, keep it in an airtight container. Avoid the fridge—bread dries out quickly when chilled.
Can I freeze Italian Easter Bread with Anise for later?
Absolutely! Once baked and fully cooled, wrap the bread tightly and freeze for up to two months. For best results, wait to ice and decorate until after thawing—the glaze and sprinkles are most beautiful when fresh.
I don’t like anise—can I use another flavor in this recipe?
Certainly! If you’re not a fan of anise, swap in the same amount of vanilla or almond extract in both the dough and icing. You’ll still get a fragrant, festive loaf, just with a different twist.
Celebrating Easter with Homemade Italian Anise Bread
Few baking projects fill your home with the promise of celebration like Italian Easter Bread with Anise. The warmth of the dough under your hands, the sparkle of sprinkles over creamy icing, and the soft crumb scented with anise are all little acts of joy. It’s a bread that tells a story, that gathers old and new traditions around your table. Pour a cup of coffee, slice generously, and savor every bite—it’s Easter, after all.
More Delicious Recipes
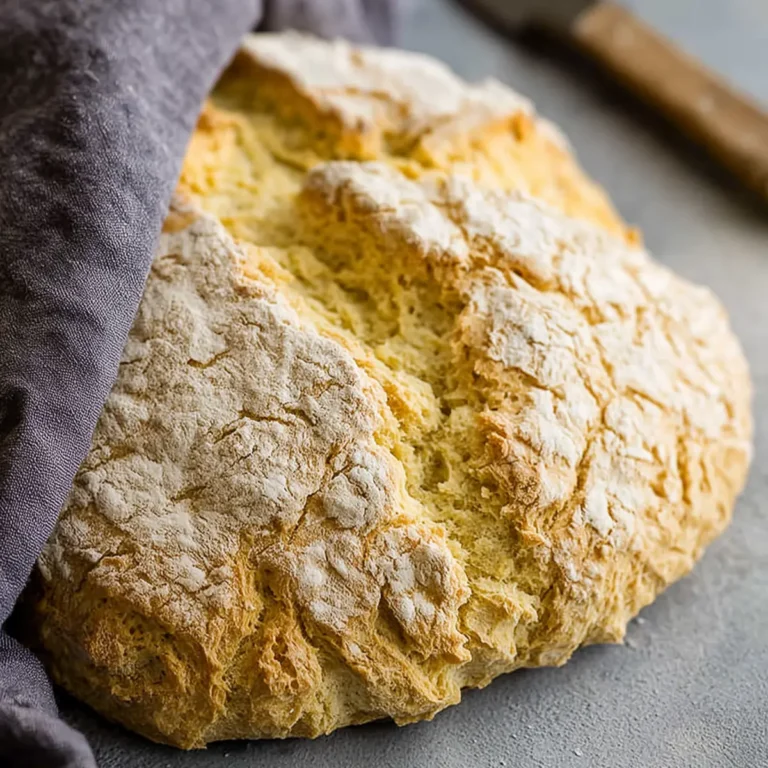
- Irish Scones: These tender, slightly sweet scones make a delightful addition to any spring gathering, just like Italian Easter Bread with Anise.
- St. Patrick’s Day Irish Nachos with Corned Beef and Cabbage: Offering a festive twist, this dish makes a great contrast to the sweetness of the Easter bread.
- Irish Beef Stew: A hearty option that pairs well with the light sweetness of the Easter bread, perfect for a well-rounded meal.
Italian Easter Bread with Anise
Ingredients
Equipment
Method
- First, in a large mixing bowl, add: one cup of the flour, yeast, salt and granulated sugar. Stir.
- Next, heat milk and 1 tsp of the anise extract until it just starts to bubble around the edges (110F.)
- Then, add heated milk and anise extract to the flour mixture and stir until just combined.
- Next, add softened butter, two of the eggs, one at a time, (the third egg is to brush on the dough before baking,) followed by the remaining two cups of flour. Stir until well-combined and dough starts to pull together.
- Then, place on floured surface and knead for 7 or 8 minutes by hand or use a stand mixer using the dough hook. The dough should be smooth and elastic.
- Then, let the dough sit for about 10 minutes covered with a dish towel in a warm spot. The dough may not rise much if it's too cold.
- Next, split the dough into two equal balls.
- Then, roll out two long pieces about two inches thick and 14-18 inches long.
- Next, oil spray a baking sheet. Place dough pieces side-by-side and overlap them to make a twist on the baking sheet. Pinch the ends and tuck under on each side.
- Then, cover with a dish towel and allow to rise for one hour. If you're oven has the "bread proof" setting, you can put the dough in the oven and put it on the bread proof setting to rise. The dough should about double in size.
- Next, pre-heat oven to 350F.
- Then, whisk the remaining egg. Brush it on top of the risen dough.
- Next, bake the dough for 20-25 minutes. If you suspect the bread top my burn, you can gently and loosely place a piece of tin foil on it the last 10 minutes or so.
- Meanwhile, in a small mixing bowl add powdered sugar, two tbsp of milk, and one tsp of anise extract and stir until smooth.
- Next, when bread is done, let it cool 5 minutes before adding icing. Pour icing on top.
- Last, sprinkle with nonpareils.