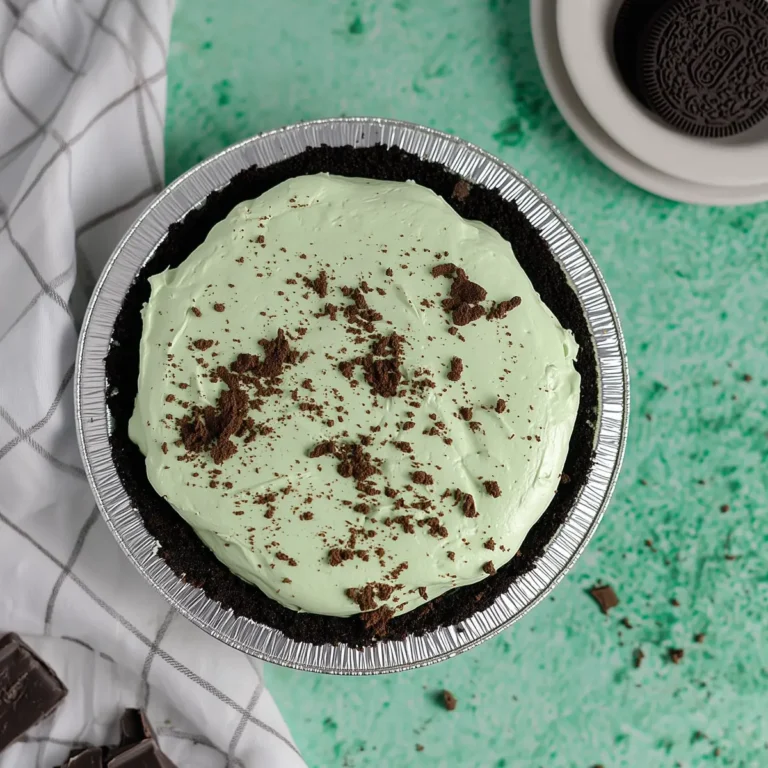
Mini Fruit Tarts With Pastry Cream: A Delicious Recipe
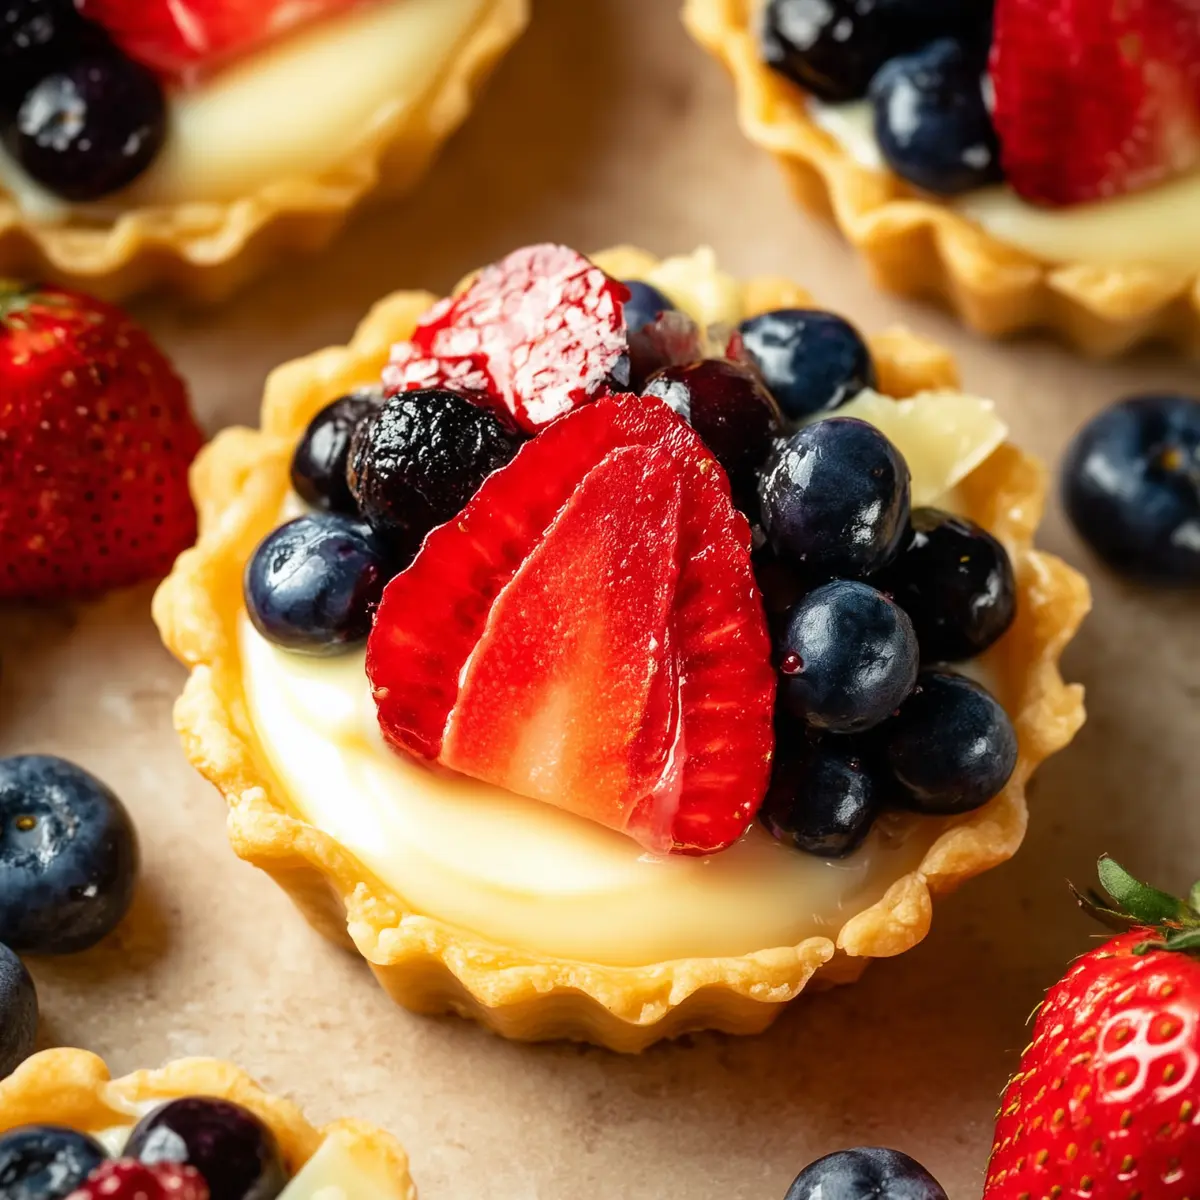
There’s something instantly joyful about biting into a mini fruit tart with pastry cream: flaky, buttery shell; silky, rich custard; bright and juicy berries on top. Whether you’re craving a showstopping dessert for a gathering or simply want to treat yourself to a bit of everyday luxury, these miniature tarts are as fun to make as they are to eat. The flavors balance perfectly—sweet, creamy, lightly tangy, with a snap of fresh fruit.
What I love most is how accessible this classic French-style treat becomes when you break it down. Each step is straightforward and rewarding, from rubbing cold butter into the dough to that satisfying final glaze. Best of all, every component can be made ahead, so your kitchen stays calm and your desserts look (and taste) like they’re straight from a little pâtisserie.
Why mini tarts are always a hit at any table
Mini fruit tarts with pastry cream are that dessert nobody can resist—equal parts elegant and playful. They look stunning lined up on a platter, every one radiating vibrant color from the fresh fruit on top, and promise layers of flavor in each bite. The contrast between the crisp tart shell and the ultra-creamy, vanilla-scented pastry cream is divine. Plus, each tart is the perfect personal portion.
I find they’re especially suited for gatherings because they can be held in one hand, require no utensils, and invite everyone to enjoy (or even customize) their little masterpiece. They also make a beautiful finish to a brunch or afternoon tea tray, with their inviting shine and delicate layers drawing people in for seconds.
Equipment to create mini fruit tarts with ease
To bring these tarts to life, you really don’t need anything fancy—just a few key tools will set you up for success:
- Food processor – For quickly blending your tart dough until it’s perfectly crumbly and barely worked.
- Rolling pin – To roll out your dough to an even thickness for crisp, delicate tart shells.
- Mini tart pans – Essential for shaping and baking your miniature tart shells to golden perfection.
- Mixing bowls – For whisking your pastry cream, mixing dough, and prepping fruit.
- Saucepan – Needed to cook the pastry cream mixture slowly and evenly.
- Whisk – Key for creating a smooth, lump-free pastry cream without scrambled eggs.
- Plastic wrap – To keep your dough and pastry cream fresh and protected while chilling.
- Piping bag with a round tip – Helps you neatly fill each tart shell with glossy, rich custard.
- Fork – For making holes in the tart shell to keep it from puffing up in the oven.
- Small bowl and brush – If you want to glaze a shiny finish on your fruit with apricot jam.
- Cookie cutter or round bowl – For cutting just the right size dough rounds for your tart tins.
Choosing the best ingredients for pastry cream and tarts
You don’t need a long list of specialty ingredients to get outstanding results—just some basics and fresh fruit. Here’s a quick look at what goes into these mini fruit tarts and what each item brings to the party:
- Butter – Creates a rich, tender, and flavorful pastry shell that melts in your mouth.
- Egg – Binds the tart dough and adds structure to the pastry.
- Vanilla extract – Infuses both the crust and the custard with that classic, dreamy aroma.
- Powder sugar – Adds subtle sweetness for a shortbread-like tart base.
- Kosher salt – Sharpens and balances all the other flavors in both dough and cream.
- Flour – Forms the sturdy yet delicate foundation for your tart crusts.
- Milk – The backbone of a creamy, smooth pastry cream.
- Egg yolks – Give the custard its golden color and velvety texture.
- Granulated sugar – Sweetens and adds just the right depth to the pastry cream.
- Cornstarch – Thickens the custard while keeping it glossy and light.
- Strawberries – Offer bursty, juicy freshness, and bold color when sliced for topping.
- Blueberries – Add sweet-tart pops of flavor and a pretty blue accent on each tart.
- Apricot jam – A quick glaze for fruit that delivers shine and stays beautifully in place.
- Water – Thins the jam into a brushable glaze for a professional finish.
See the recipe card below for the full list of ingredients and measurements.
Step-by-step: How to make mini fruit tarts with pastry cream
- Blend the dry ingredients. Add the flour, powdered sugar, and kosher salt to a food processor. Pulse until evenly combined and fine.
- Cut in the cold butter. Toss in cold, cubed butter and blend until the mixture looks sandy, with small pea-sized bits throughout. (You can do this by hand if needed, working quickly with cold hands to keep the butter from melting.)
- Add egg and vanilla. Pour in the egg and vanilla extract, then pulse just until a dough begins to gather. Avoid overmixing—the dough should hold together but not feel tough.
- Chill the dough. Gather the dough, flatten it into a disk, wrap in plastic, and refrigerate for at least 1 hour. Don’t skip this step; chilling ensures tender, shrink-free tart shells.
- Roll and cut the dough. Turn the dough onto a lightly floured surface and roll it into a rectangle about 0.5 cm thick. Use a cookie cutter or bowl just larger than your tart pans to cut rounds.
- Press into pans. Gently fit each round into a mini tart pan, pressing up the sides without stretching, then trim the edges. Prick the bottom with a fork (this keeps it flat as it bakes).
- Freeze the shells. Pop the prepared pans into the freezer for at least 20 minutes. This helps the crust hold its shape in the oven.
- Bake until golden. Bake in a preheated oven at 180°C until the shells are a soft golden color and smell nutty, about 15–20 minutes. Let them cool before filling.
- Make the pastry cream. In a saucepan over high heat, bring the milk and vanilla extract to a gentle simmer, then remove from heat. Scoop out 60 ml (about 1/4 cup) and set aside.
- Mix sugar, cornstarch, and egg yolks. In a small mixing bowl, whisk together the granulated sugar and cornstarch. Add the egg yolks and mix until smooth and creamy.
- Temper the eggs. Slowly whisk in the reserved hot milk, little by little, to warm up the egg mixture. This prevents scrambling when you add everything to the pan.
- Combine and thicken. Return the saucepan to low heat. Whisk in the tempered egg mixture, cooking and stirring constantly over medium-low until the custard thickens to a pudding-like consistency. (Be patient—don’t try to speed this up!)
- Chill the pastry cream. Scrape the hot custard into a bowl, press plastic wrap directly onto the surface, and chill until set and cold, a few hours or overnight.
- Fill the tart shells. Pipe or spoon the smooth, glossy pastry cream into each cooled shell. You want a thick, inviting swirl in every crust.
- Top with fruit. Slice strawberries and arrange along with blueberries (or your favorite fruit) over the pastry cream. Let the colors overlap for a beautiful mosaic effect.
- Glaze the fruit (optional). Stir apricot jam and water together, then gently brush it over the fruit for an irresistible shine.
Tips, troubleshooting, and common mistakes with mini fruit tarts
Even the best bakers hit a few bumps with tarts, but these fixes keep things on track:
- Dough too sticky? Pop it back in the fridge until firm. Warm dough stretches and shrinks, so work quickly and keep things cold.
- Shells lost their shape? Freezing tart pans before baking helps prevent slumping—don’t skip this step.
- Crust too dense or tough? Overmixing works the gluten and can make tart shells hard. Stop mixing as soon as dough comes together.
- Custard too runny? Cook the pastry cream slowly and wait until it visibly thickens and holds a soft shape on the spoon before taking off the heat.
- Custard lumpy? Pour custard through a fine mesh sieve once cooked for an ultra-smooth finish.
- Fruit slipping off? Let the pastry cream chill and set fully; glaze the fruit for extra hold and shine.
- Soggy bottoms? Always cool shells fully before filling; a little time in the refrigerator after assembly also helps keep the base crisp if you’re serving later.
Pairing ideas and creative variations for these tarts
Mini fruit tarts with pastry cream are a dessert chameleon—pair them, tweak them, and they’ll always shine. For company, serve alongside a sparkling rosé, a pot of English breakfast tea, or a silky coffee. They’re wonderful with other light desserts: think lemon bars, vanilla meringues, or even a chocolate pot de crème for a contrast.
To add your own spin, try:
- Fruit swaps: Top with raspberries, kiwi, mango, blackberries, or thinly sliced peaches for new color and flavor.
- Gluten-free option: Use your favorite gluten-free flour blend in place of regular flour for the shells.
- Extra flavor: Fold a touch of citrus zest into the pastry cream, or add a splash of almond extract to the crust for a twist.
- Festive ideas: Arrange fruit to mimic flags, hearts, or holiday motifs—perfect for parties or celebrations.
- Chocolate lover’s variation: Sprinkle a little shaved chocolate on top, or stir melted chocolate into half the pastry cream for swirls.
FAQs about Mini Fruit Tarts With Pastry Cream
Can I make mini fruit tarts with pastry cream ahead of time?
Absolutely! Both the tart shells and the pastry cream can be made a day or two ahead—just store the shells airtight at room temperature, and keep the pastry cream covered and chilled. Assemble with fruit shortly before serving for the freshest texture.
What are the best fruit choices for topping these mini tarts?
You can use any berries or diced fruit that are ripe and not too wet—strawberries, blueberries, raspberries, blackberries, peaches, or kiwi all look and taste fantastic. Make sure to pat fruit dry with a towel for the prettiest results.
How should I store leftover mini fruit tarts with pastry cream?
Store assembled tarts in the refrigerator, loosely covered, for up to 2 days. The crust will stay crispest if you add the fruit and glaze just before serving, but even fully assembled tarts are delicious the next day (if they last that long!).
The magic of homemade mini fruit tarts with pastry cream
There’s something truly special about making mini fruit tarts with pastry cream from scratch—the ritual of mixing dough, the scent of warm shells, that silky swirl of custard, and those juicy fresh berries on top. The colors pop, the flavors sing, and every bite is a little celebration. Serve these at your next gathering or savor one solo with a cup of tea—they bring pure, joyful treat energy every time.
More Delicious Recipes
- Irish Shortbread: This buttery dessert pairs beautifully with the creamy texture of mini fruit tarts and is simple to make ahead of time.
- Lucky Charms Bars: These fun, colorful treats could serve as a playful complement to your elegant tarts.
- Irish Scones: Serve these light and fluffy scones alongside your fruit tarts for a delightful brunch spread.
Mini Fruit Tarts With Pastry Cream
Ingredients
Equipment
Method
- Start by making the tart dough. In a food processor, add the flour, powdered sugar, and salt, and mix until combined.
- Add the cold cubed butter, and blend until there are pea-sized pieces of butter. If you don't have a food processor, you can do it by hand, mixing the cold butter into the flour mixture. Make sure that your hands are cold.
- Then, add the egg, and the vanilla extract and mix until a dough forms. Try not to overmix the dough.
- Cover the dough with plastic wrap and let it chill in the fridge for at least an hour.
- Transfer the dough onto a clean floured surface and roll it with a rolling pin into a rectangle.
- Use a cookie cutter or a round bowl (1 inch larger than the mini tart pans) and cut small rounds of the pastry.
- Place the pastry inside the mini tart pans and press it down using your clean hands.
- Cut off the extra edges. Make holes in the bottom of the pan with a fork and place them in the freezer for at least 20 minutes.
- Bake in a 180c (350f) preheated oven for about 15-20 minutes or until the crust is a light golden brown color. Remove from the oven and let it cool while making the filling.