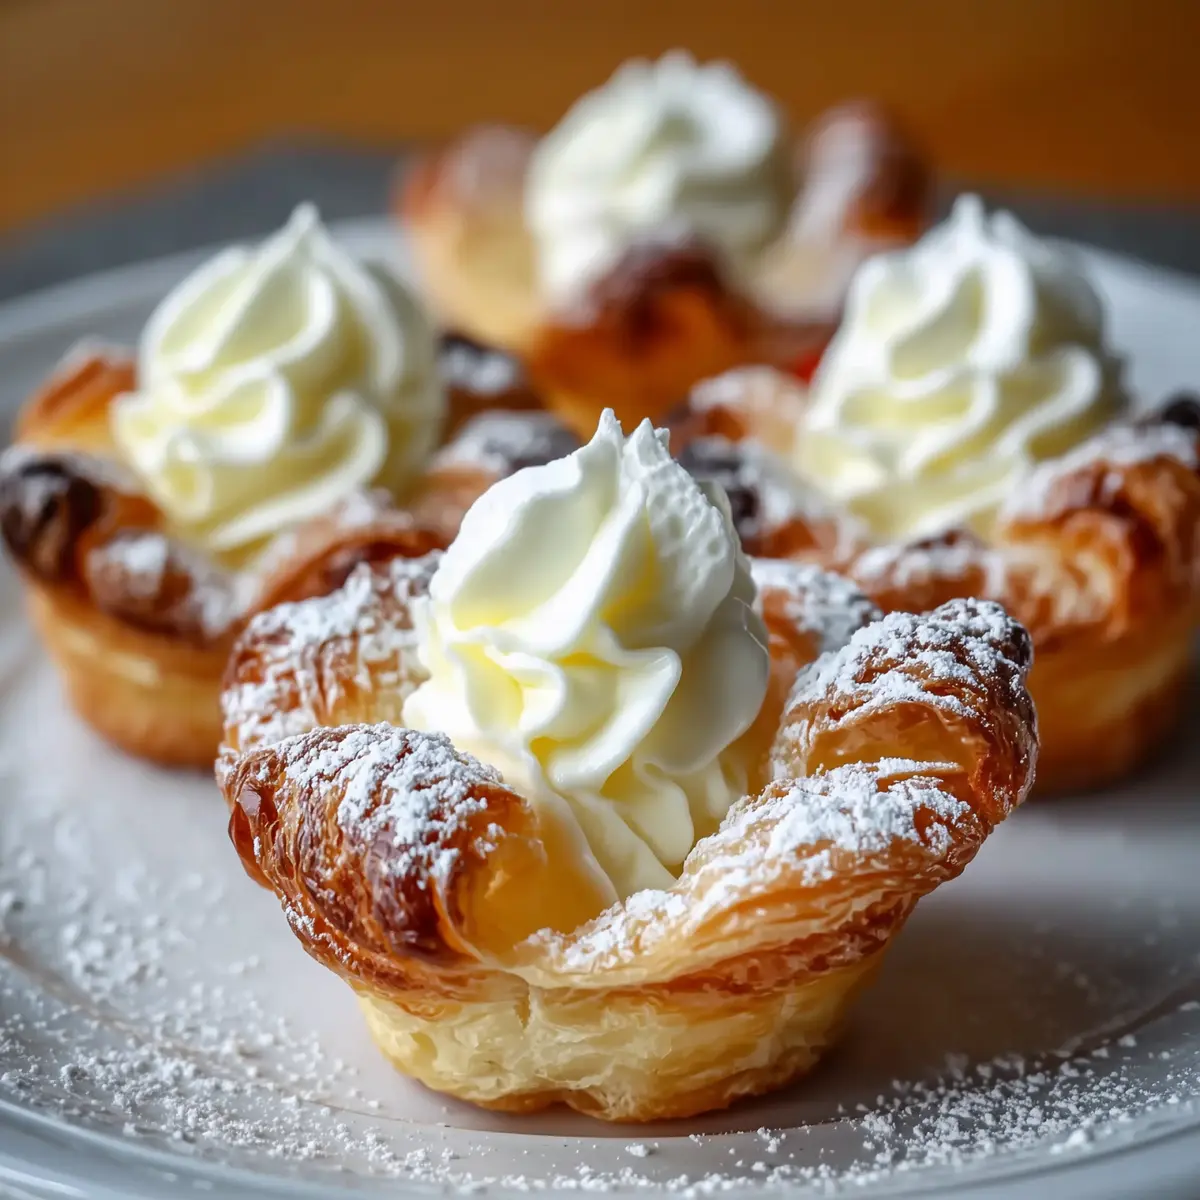
30-Minute Mini Cream Pastry Cups for Any Occasion
The way the kitchen smells when I bake these 30-Minute Mini Cream Pastry Cups always takes me right back to lazy Saturday afternoons—sunlight streaming across the countertop and that unbeatable combo of warm pastry and sweet, whipped cream filling drifting in the air. These little cups may seem dainty, but don’t let their size fool you; they have a way of disappearing embarrassingly fast whenever I put out a tray. The golden, crisp shell gives just enough resistance before giving way to creamy clouds inside. Whether you’re planning a dessert buffet, a birthday treat, or just want a bit of pastry joy after dinner, these mini cream pastry cups fit the bill perfectly.
They look so sweetly impressive that everyone assumes you’ve spent hours laboring in the kitchen. But, in reality, you can toss them together with a handful of everyday ingredients, a bit of chilled butter, and just a touch of patience working the dough into tiny muffin tins. Somehow, within just half an hour, you’ll be rewarded with pastries that feel like a special occasion, even if the only celebration is making it through a long week.
When 30-Minute Mini Cream Pastry Cups Steal the Show
There’s always that one treat on the dessert table everyone gravitates toward first, and these 30-Minute Mini Cream Pastry Cups never fail to be it. Maybe it’s their size—just a little larger than a bite, temptingly golden, with powdered sugar dusted across the tops like fresh snow. They’re the ultimate crowd-pleaser, a little nostalgic and completely irresistible. I brought a tray to a family brunch once, and my teenage cousins devoured half of them before the kettle had even finished boiling. The best part? Nobody guesses they only take thirty minutes start to finish. It’s dessert magic, plain and simple, and everyone wants to know your secret.
Pantry Essentials That Make These Pastry Cups Pop
- flour – gives structure and a delicate crumb to your pastry cup; opt for plain flour for a tender shell.
- Butter – adds irresistible flavor and the flakiness you need for a real pastry edge; chill it thoroughly before you start blending it in.
- Sugar – a little sweetness in the dough keeps things balanced with the rich cream.
- Salt – balances the sweet notes and sharpens each bite; don’t skip it, even if you’re a sweet-tooth.
- Heavy cream – whips up light and semi-sweet, filling each shell with creamy clouds.
- Vanilla extract – lending warmth and aromatic depth to the filling; real extract makes a difference.
- Powdered sugar – not just for decorating but adding gentle sweetness to the whipped cream and the final flourish.
See the recipe card below for the full list of ingredients and measurements.
Turning Basic Ingredients into Lovely Pastry Cups
Getting the dough just right is half the fun—and, honestly, half the pleasure of baking. Here’s how everything comes together seamlessly:
- Start with cold fingers and colder butter. Mix your dry ingredients—the flour, sugar, and salt—in a roomy bowl. You want to use your fingertips or a pastry cutter to rub in the butter. Aim for a crumbly texture, somewhere between breadcrumbs and damp sand; don’t work it to death. The trick is speed and a light touch.
- Once you’ve got your crumble, press spoonfuls into mini muffin pans, pushing from the middle upward to encourage the dough up the sides. Perfection isn’t the goal—rustic pastry always has more soul. Try to keep the thickness as even as you can so they bake up crisp.
- Slide those pans into a hot oven. You’re looking for a gentle golden blush at the edges and a faintly toasty aroma wafting through your kitchen. The moment they turn perfect, pull them out and let them cool for a minute before transferring the shells to a rack—they’re fragile when hot but crisp up as they lose steam.
- While the cups cool down, turn your attention to the filling. Pour cold heavy cream into a mixing bowl, add a splash of vanilla extract and a dusting of powdered sugar. Using an electric mixer (or elbow grease if you’re old-school), whip until you get soft, then stiff, peaks. The cream should hold shape but still look plush—don’t overwhip past this point, or you’ll end up with butter.
- Once your shells are entirely cool—important, or you’ll melt the cream—fill each one generously. Use a piping bag if you love the look, or just spoon it in for a casual feel. A final dusting of powdered sugar across the tops transforms them from everyday tasty to absolutely captivating.
- Chill for a few minutes if you can wait. They’re best served lightly cold, but honestly, I’ve seen them vanish from the tray before they ever hit the fridge.
What Biting Into These Cups Is Really Like
The very first bite into these mini cream pastry cups has this unbeatable crunch that gives way—almost in a sigh—to lush, velvety cream. The shell is light and delicate, a whisper of butter, with subtle sweetness that meets the rich filling in the middle. You get a snap from the golden crust, followed by the dramatic cool softness of whipped cream, and just a soft hint of vanilla drifting after. It’s a mix of textures—crisp, creamy, slightly chewy at the rim—and a dessert that somehow manages to feel both rich and light at the same time. The dusting of powdered sugar on top? It’s more than garnish. It’s that perfect, delicate finish—just the thing you catch on your lips before the last bite.
Details That Make Your Mini Cream Pastry Cups Unstoppable
- Keep your butter cold right up until mixing. If your kitchen’s warm, pop your cubed butter in the freezer for a few minutes before you start. Cold butter is the key to flaky, delicate pastry.
- Don’t pack in the dough too densely in the muffin tins. Gently press—overhandling can make the crust tough instead of melt-in-the-mouth.
- For a flavor twist, try adding a hint of citrus zest or a sprinkle of cinnamon to the cream.
- Swap out vanilla for almond or orange extract if you’re feeling adventurous, or fold in a few mashed berries with the cream for a summery twist.
- If you’re prepping ahead, the empty pastry cups will keep well in an airtight tin for a day or two. Fill them just before serving for maximum crunch.
- These freeze surprisingly well unfilled; just let them thaw at room temperature, then add your whipped cream filling right before serving.
- Dress them up for a party by topping each cup with a berry, a twist of lemon peel, or even a few slivers of toasted almond.
Serving These Cups in Style
There’s no wrong way to enjoy these pastry cups, but if you want to make them the centerpiece, try arranging them in tight circles on a vintage cake stand, dusted lightly with extra powdered sugar right before serving. For birthdays, drop a raspberry or a wedge of strawberry in the cream for some color. At holiday gatherings, serve alongside espresso or hot chocolate—the cool, silky filling makes a perfect foil for something warm and rich. They’re the sort of treat that vanishes at potlucks and never make it home from picnics. Honestly, I’ve packed up a batch in a cookie tin and handed them over as a hostess gift—instant hero status. However you serve them, don’t be surprised when they’re the first to disappear.
FAQs about 30-Minute Mini Cream Pastry Cups
How long do 30-Minute Mini Cream Pastry Cups stay fresh?
These pastry cups are at their very best the day you make them, once filled. If you need to store leftovers, cover them and refrigerate for up to 24 hours. After that, the pastry may lose a bit of its crispness, but they’re still tasty enough to enjoy the next day.
Can I freeze mini cream pastry cups ahead of time?
You can freeze the baked (unfilled) pastry shells in an airtight container for up to one month. Let them thaw at room temperature before adding the cream filling. Don’t freeze once filled with cream, as the texture won’t survive the thaw.
What are good substitutions if I run out of heavy cream?
If you don’t have heavy cream, try whipping double cream or full-fat coconut cream for a non-dairy option. Lighter creams or milk won’t whip properly, so it’s best to stick with something rich and high-fat for that signature fluffiness.
Can I make the 30-Minute Mini Cream Pastry Cups shell gluten-free?
Definitely. Swap in a good-quality gluten-free flour blend to make the pastry cups, keeping an eye on consistency—it should be crumbly and not too sticky. The rest of the process stays just the same, and nobody will know the difference if you nail the texture.
There’s just something about baking a batch of 30-Minute Mini Cream Pastry Cups that makes any day feel celebratory—even the most ordinary Tuesday night. The smell of pastry in the air, the barely-there crunch paired with a sweet, creamy middle—it’s like a hidden treat for you and anyone lucky enough to be around when they’re served. However you choose to dress them up (or not), these little cups offer all the comfort and elegance of classic bakery treats without the bakery fuss. I can’t think of a cozier, more delightful way to wrap up a meal, or to surprise someone with a bite of pure, creamy joy.
More Delicious Recipes
- Irish Shortbread: These buttery cookies complement the creamy filling of the pastry cups perfectly.
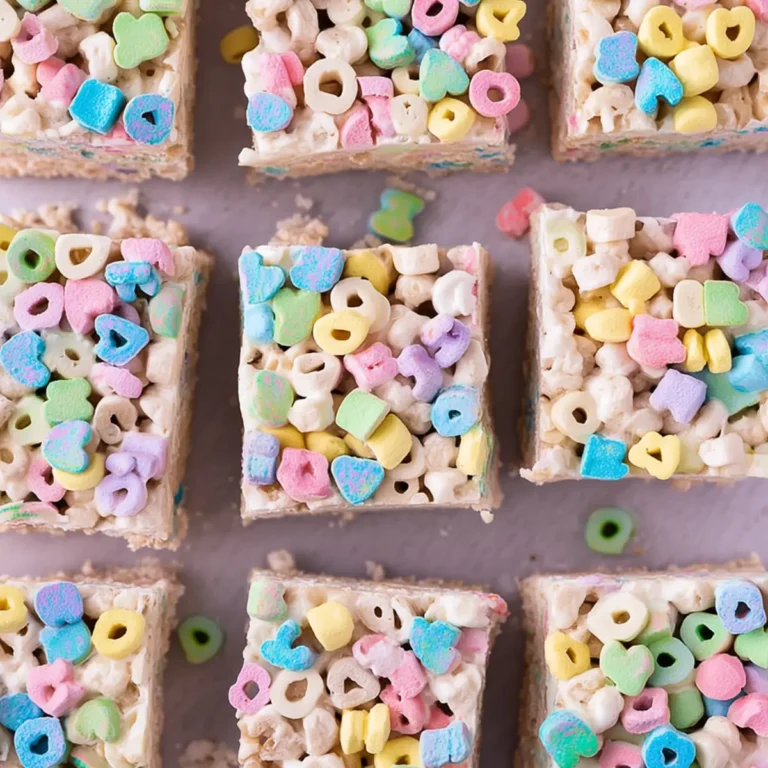
- Lucky Charms Bars: If you love sweet, indulgent treats, these colorful bars are a fun twist for dessert lovers.
- St. Patrick’s Day Brownie Trifle: This layered dessert offers rich flavors that pair well with the lightness of the cream pastry cups.
30-Minute Mini Cream Pastry Cups: Irresistibly Delightful Treats
Ingredients
Equipment
Method
- Preheat oven to 350°F (175°C).
- Mix flour, sugar, and salt in a bowl.
- Cut in butter until mixture resembles crumbs.
- Press dough into mini muffin tins to form cups.
- Bake for 15 minutes until golden.
- Whip cream with vanilla and powdered sugar until stiff peaks form.
- Fill cooled pastry cups with cream.
- Serve chilled.