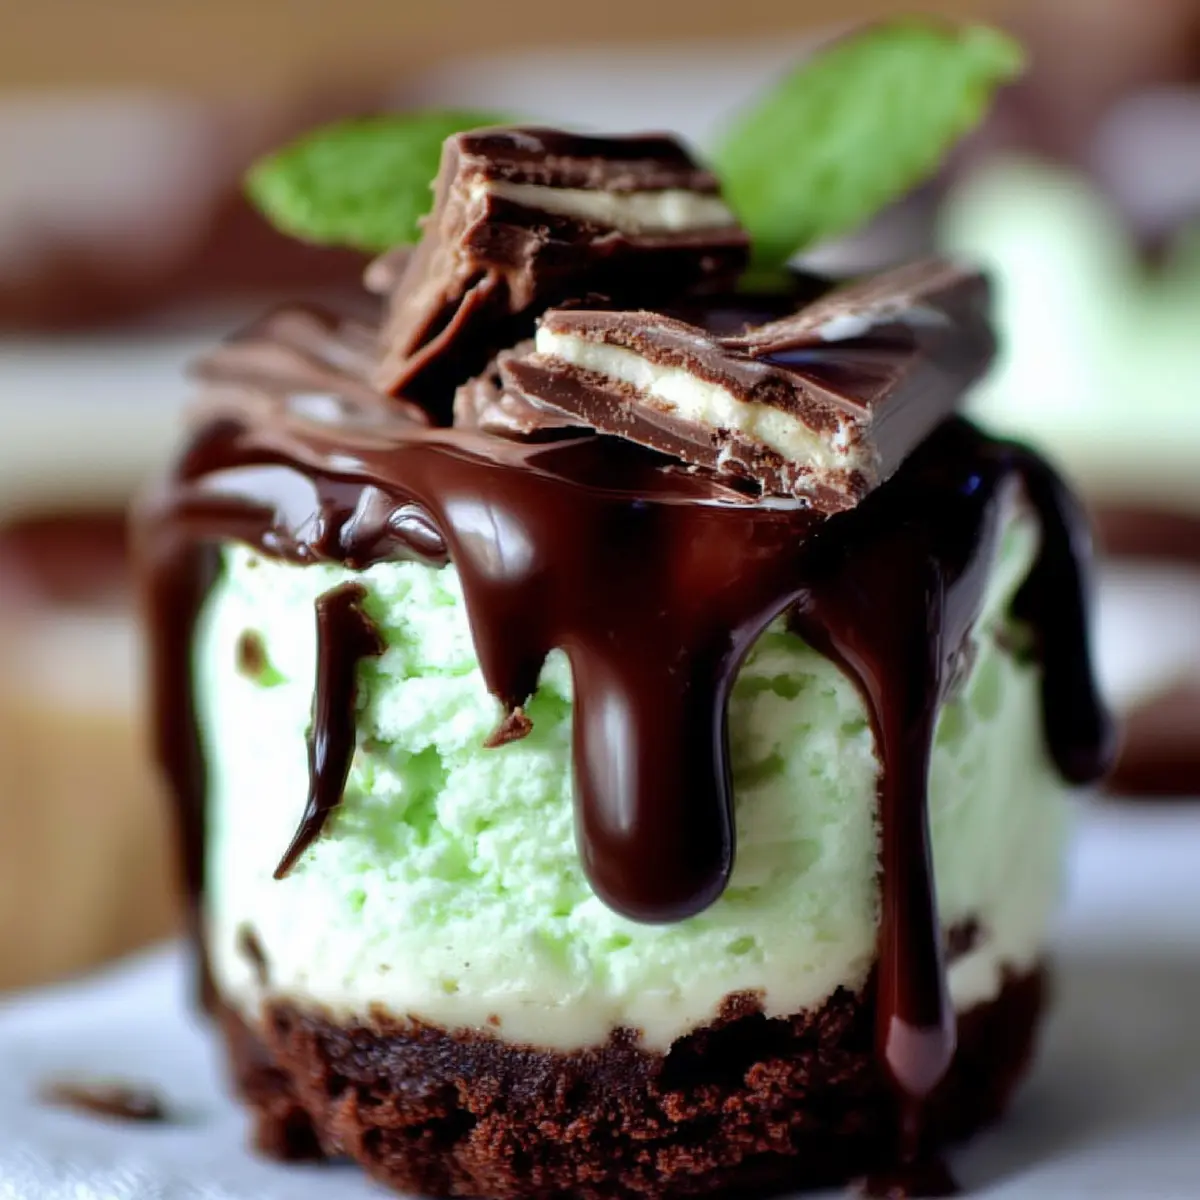
Andes Mint Mini Cheesecakes: A Festive Treat
There’s just something magical about the combination of creamy cheesecake, rich chocolate, and cool mint. Andes Mint Mini Cheesecakes bring all of those crowd-pleasing flavors together in one adorable, party-sized treat. Whether you’re planning a holiday spread, a birthday bash, or just want a pop of minty chocolate indulgence, these little beauties are pure joy baked into a bite.
They’re freezer friendly, totally festive, and perfect for making ahead. The minute you lift one from the pan and see that distinct minty green layer and decadent chocolate top, you’ll know you made the right choice. There’s a fantastic contrast between the crisp chocolate graham cracker crust and the dreamy-soft cheesecake, all finished with those classic Andes Mint pieces. It’s like a peppermint patty and a cheesecake had the most delicious baby.
Essential tools for creating the mint mini cheesecakes
You don’t need a bakery kitchen to pull off these little treats, but a few key tools make the process smooth and stress-free:
- Mini cheesecake pan – Ensures perfectly shaped, individual cheesecakes with easy removal after chilling.
- Nonstick baking spray – Helps release the cheesecakes cleanly and prevents sticking.
- Stand mixer – Blends the cream cheese filling until it’s silky and lump-free. A hand mixer works, too.
- Spoon – Handy for pressing the crust into each pan cavity and scooping filling evenly.
- Microwave – Melts your chocolate chips for the glossy topping.
- Wooden spoon – Used to gently prop the oven door open for gradual cooling (this prevents cracking!).
That’s it. No fussy water baths, no springform pans—just classic, straightforward baking.
Breaking down the key ingredients for flavor and texture
- Nonstick baking spray – Keeps your mini cheesecakes from sticking, so you get beautiful, clean edges every time.
- Chocolate graham cracker crumbs – Lends the crust a deep, cocoa flavor that balances the cool mint and rich filling.
- sugar – Adds sweetness to both the crust and filling, so each layer gets its moment to shine.
- Butter melted – Binds the graham cracker crumbs for a rich, cohesive crust that won’t fall apart.
- Cream cheese softened – The backbone of the cheesecake, it creates a creamy, luxurious texture—that signature tang included!
- Egg – Gives structure, helping the cheesecake set just right as it bakes.
- Mint extract – Brings that unmistakable Andes minty coolness to every bite.
- Green food coloring – Gives the filling its distinctive pale minty hue, making each mini so inviting and festive.
- Chocolate chips – Melted for the glossy topping, adding a final hit of chocolate flavor and dramatic shine.
- Andes mints coarsely chopped – The iconic finishing touch: creamy, crisp, mint-chocolate pieces for decoration and taste.
See the recipe card below for the full list of ingredients and measurements.
Step by step: crafting your Andes Mint Mini Cheesecakes
- Preheat and prepare – Start by setting your oven to 165°C. Generously spray your mini cheesecake pan with nonstick baking spray, making sure every cavity is well coated for easy cheesecake release later.
- Mix chocolate crust – In a bowl, combine the chocolate graham cracker crumbs, 2 tablespoons of sugar, and the melted butter. Stir until the mixture resembles wet sand and holds together when pressed between your fingers.
- Build the base – Spoon the crumb mixture evenly into each well of your prepared mini cheesecake pan. Use the back of a spoon to gently press the crumbs down until packed and level—they should look compact and feel slightly firm.
- Make the minty filling – In your stand mixer, blend the softened cream cheese with the remaining sugar. Beat until silky smooth and completely lump-free. Add the egg, mint extract, and green food coloring, mixing on low just until incorporated—the filling should be pale and uniform but not overmixed.
- Layer and fill – Divide the mint cheesecake filling evenly over the prepared chocolate crust bases, smoothing each top with a spoon or spatula.
- Bake gently – Slide your pan into the oven and bake for 20 minutes. The centers should still jiggle slightly but the edges will look set.
- Cool slowly – Turn off the oven. Prop the door open with a wooden spoon and let the cheesecakes sit for another 5–10 minutes. This gentle cooling step is what keeps the tops from cracking.
- Chill until firm – Remove the pan from the oven and transfer it to the fridge. Chill for several hours or overnight so the cheesecakes completely firm up and can be removed effortlessly.
- Prepare the topping – Melt your chocolate chips in the microwave according to the package directions, stirring every 20–30 seconds until completely smooth and glossy.
- Finish and serve – Top each mini cheesecake with a lush spoonful of melted chocolate and a scattering of coarsely chopped Andes mints. The chocolate will set with a sheen and hold the mint pieces—a delight to bite into.
Tips, troubleshooting, and common mistakes for perfect minis
- Overbeating the filling? Mix your cheesecake filling just until combined once the egg goes in. Overmixing can lead to airy batter, which causes cracks or a puffy, uneven texture.
- Sticky release? Make sure to spray your pan well with nonstick baking spray, especially around the edges. If you’re having trouble releasing the minis, a thin knife run around the edge after chilling works wonders.
- Cracking woes: Rapid temperature changes are the main culprit. Letting your cheesecakes cool with the oven door propped open helps them set slowly and beautifully.
- Too soft or runny? Be sure to fully chill your cheesecakes for several hours—overnight is even better. If rushed, the centers may not set firmly.
- Dull chocolate topping? Stir your chocolate chips until totally smooth and glossy before topping the cheesecakes. Don’t overheat; gentle melting yields the best sheen.
Honestly, even with the odd crack or slightly uneven top, these are so cute and decadent no one will care. The combination of mint, chocolate, and cheesecake is what shines!
Pairing ideas and fun twists on Andes Mint cheesecakes
Andes Mint Mini Cheesecakes are a treat on their own, but a few pairing ideas or creative adjustments can make them even more memorable:
- Coffee or espresso: The deep notes of coffee are a natural complement to mint and chocolate. Serve these after a dinner party for a spirited, café feel.
- Holiday hot chocolate: Make a winter dessert board with mugs of hot chocolate and these cheesecakes as centerpiece bites.
- Fresh berries: Pair with fresh strawberries or raspberries if you love a fruity contrast to the rich, minty filling.
- Nutty crunch: Sprinkle crushed pistachios or toasted almonds with the Andes mints for extra texture and a bit of color variation.
- Festive toppings: For birthdays or special occasions, add colorful sprinkles or a drizzle of white chocolate on top before the mint pieces set in.
- Try different extracts: Swap mint for peppermint extract for a bolder holiday flavor, or use orange extract for a twist on the classic chocolate-mint combo.
However you pair or tweak, one thing’s for sure—these are destined to disappear fast from any dessert table!
FAQs about Andes Mint Mini Cheesecakes
Can I make Andes Mint Mini Cheesecakes ahead of time?
Absolutely! These cheesecakes are freezer friendly and perfect for making ahead. After chilling and topping, store them in an airtight container in the fridge for up to 3 days or freeze for up to a month. Thaw in the fridge overnight before serving.
What can I use if I don’t have a mini cheesecake pan?
You can use a standard muffin tin lined with paper liners as an easy substitute. The cheesecakes will be slightly larger but still just as delicious. Be sure to spray the liners lightly and chill well before removing.
How do I store leftover Andes Mint Mini Cheesecakes?
Keep any extras in a single layer in an airtight container in the fridge. They’ll stay fresh for several days and the crust will hold its texture. For longer storage, freeze the cheesecakes without the topping, then thaw and add chocolate and mints when ready to serve.
The final mint chocolate bite: sweet and simple joy
There’s nothing quite like the moment you bite into Andes Mint Mini Cheesecakes—the chocolate crumb base has just the right crunch, the minty filling is cool and velvety, and those pops of Andes Mint make each mouthful a little celebration. If you love the classic combination of chocolate and mint, this dessert hits every note: rich, creamy, fresh, and just the right amount of indulgent. Serve chilled, share with friends, and let the compliments roll in.
More Tasty Ideas
- St. Patrick’s Day Mint Blossom Cookies: These cookies blend mint and chocolate flavors, making them a fun addition to your minty desserts.
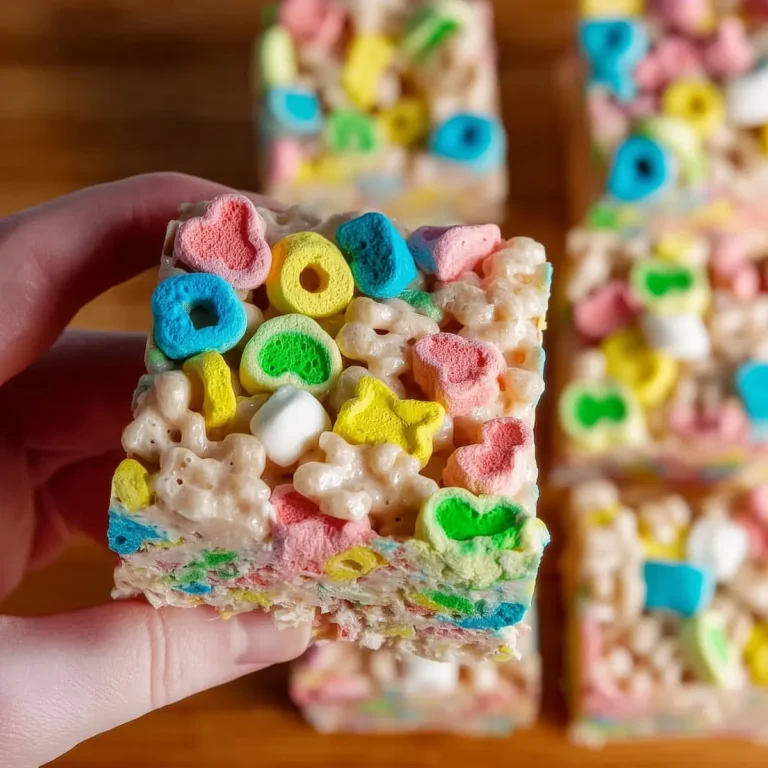
- Lucky Charms Bars: A sweet treat that includes marshmallows and cereal, perfect for a whimsical dessert experience.
- St. Patrick’s Day Lucky Chow: A delightful mix of chocolate and cereal clusters, offering a crunchy texture similar to the andes mint cheesecakes.
Andes Mint Mini Cheesecakes
Ingredients
Equipment
Method
- Preheat oven to 325 degrees and spray the mini cheesecake pan with nonstick baking spray.
- Combine graham crackers, 2 tablespoons of sugar, and butter. Divide in the mini cheesecake pan evenly. Press down gently with a spoon.
- In a stand mixer, blend cream cheese and 1/4 cup plus 2 tablespoons of sugar until smooth and creamy. Add the egg, mint extract, and food coloring: mix just until incorporated on low. Spoon the cream cheese mixture over the chocolate graham crackers, dividing evenly.
- Bake for 20 minutes. Turn off the oven, prop open the oven door with a wooden spoon, and allow the cheesecakes to cool down slowly for only about 5-10 minutes, then remove them from the oven.
- Remove from oven and chill for several hours or overnight before removing from pan.
- Melt chocolate chips in the microwave according to the manufacturer's instructions. Top each mini cheesecake with a heaping tablespoon of chocolate and a few pieces of Andes mints.