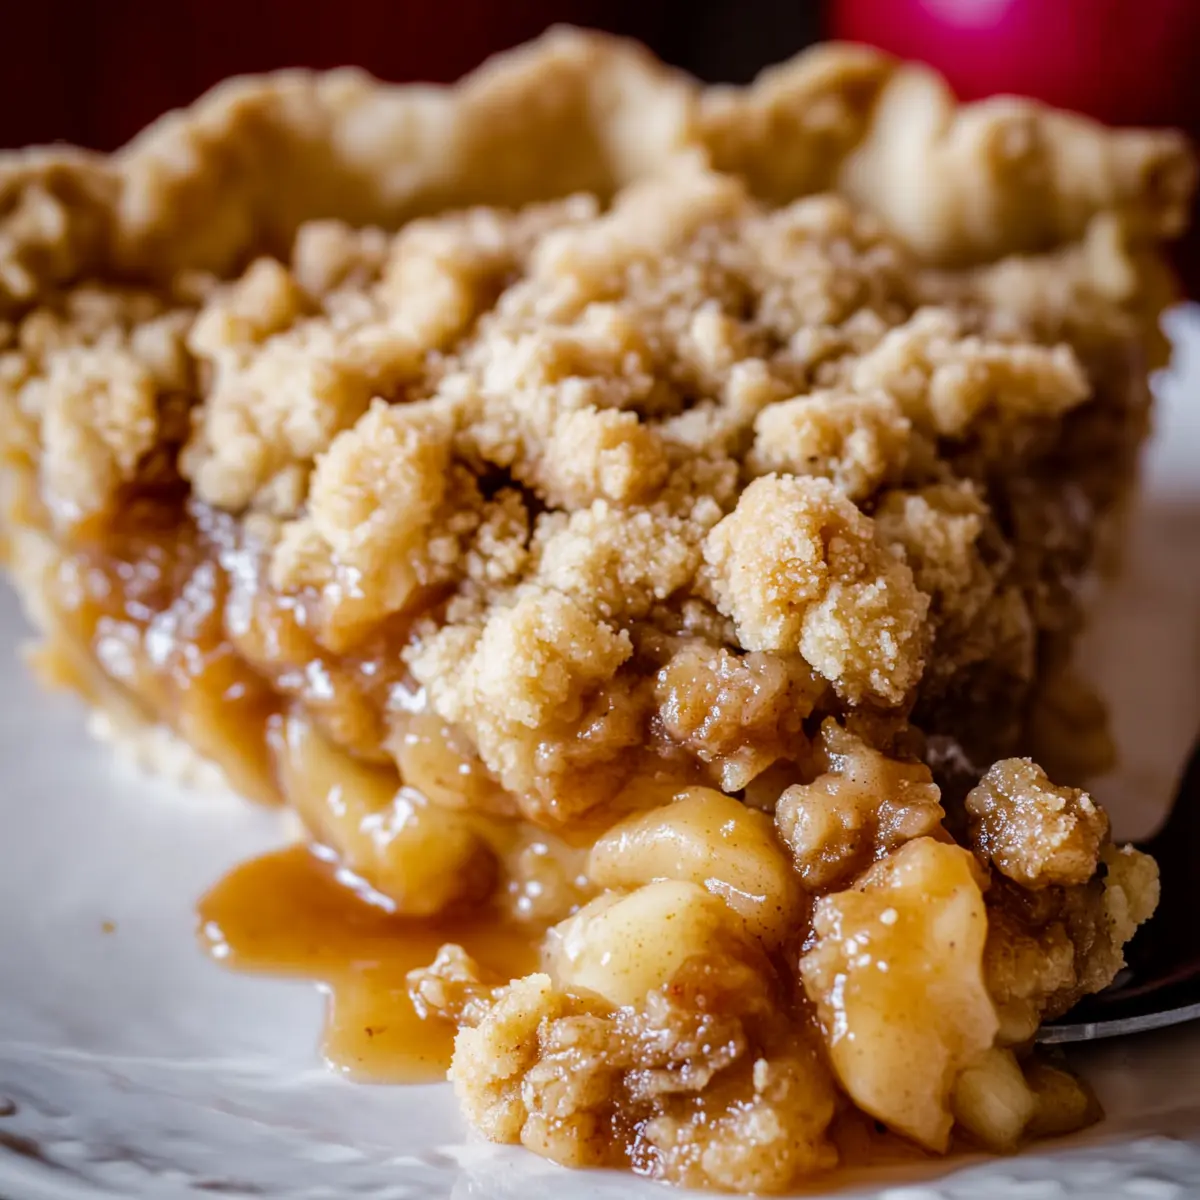
Dutch Apple Crumble Pie: Comfort Baking at Its Best
If you’ve been craving something cozy with a twist, this Dutch Apple Crumble Pie is exactly where you want to land. This isn’t your ordinary apple pie—think deeply spiced apples nestled in a flaky crust, finished with a buttery crunch on top that crackles under your fork. It’s comfort baking at its best: just rustic enough to keep things easy, but fancy enough to impress everyone at the table.
The scent when it’s in the oven is wild—in 20 minutes flat your kitchen fills with buttery streusel and cinnamon aromas that basically scream autumn, even if it’s spring. You get that tender, perfectly caramelized apple filling, with a crisp, golden top that stays crunchy, never soggy. And let’s be honest: that crumb topping is really here to steal the show.
Why This Dutch Apple Crumble Pie Stands Out
Beneath the golden crumbly surface, this Dutch Apple Crumble Pie packs layers of texture and taste. You get a crisp bite from the buttery, flaky base, then a cozy pool of soft, spiced apples, and finally a thick blanket of cinnamon-streusel topping for major crunch. Each layer brings something different to the party.
What really wins people over is the contrast: tender fruit, rich pastry, and that shattering crumble top. It works for autumn gatherings, a weekend baking project, or just when you’re hit with a serious pie craving. This isn’t a fussy dessert, either. You can prep it ahead or even freeze it.
Every bite brings the unmistakable flavors of apple pie—deep, spiced fruitiness, warmth from nutmeg and cinnamon, and all the rustic comfort you could want. It’s got plenty of classic nostalgia, but the Dutch-style crumble makes it feel just a little more special.
The Ingredients Behind the Pie
- pie crust: delivers a salty, buttery foundation for all the layers above—store-bought or homemade both work.
- Apples: the core of this pie! A mix of sweet and tart varieties (think Granny Smith, Honeycrisp, Golden Delicious) balances flavor and keeps the filling from getting mushy.
- Lemon zest & juice: brightens up the filling and keeps those apples vibrant, not brown.
- Brown sugar: adds subtle caramel notes and extra depth in the filling and topping.
- Granulated sugar: sweetens and helps the apples release their juices, giving the gooey layer you want.
- All-purpose flour: thickens the apple filling and forms the crumb topping.
- Cinnamon, nutmeg, cardamom: the trio that brings cozy, warmly spiced flavor to both filling and topping.
- Kosher salt: sharpens all the sweet flavors and keeps things from tasting flat.
- Vanilla extract: rounds out the filling and brings everything together.
- Butter: melts into the crumb topping for a rich, crunchy bite.
See the recipe card below for the full list of ingredients and measurements.
Smart Swaps for the Dutch Apple Crumble Pie
If you’re running low on something or need to adjust for dietary needs, this recipe is super flexible. Swap in a gluten-free flour blend if you want the crumble to be gluten-free—just be sure it’s one that bakes the same as all-purpose flour. Prefer a different fruit? Try pears for a mellow twist or toss in some cranberries for bright tang.
Not a fan of cardamom? Just skip it, or maybe add a little extra cinnamon instead. Dairy-free? Use coconut oil or a plant-based butter for the crumble topping. And if you’re pressed for time, a quality store-bought crust absolutely does the trick.
How to Make Dutch Apple Crumble Pie: A Step-by-Step Guide
- Pick your apples. Choose a mix of tart and sweet for a filling that’s complex—not one-note. Peel, core, and slice the apples thinly. Mixing varieties helps keep the texture lively.
- Start the filling. Get the zest of a lemon into a large skillet, then add just enough lemon juice to coat. Toss your apple slices in as you go—this step wakes up their flavor and stops them from browning.
- Add the spices and sugars. Sprinkle in cinnamon, nutmeg, a hit of cardamom (if you’re up for it), brown and white sugars, and a pinch of salt. Toss gently—don’t break up those apple slices!
- Cook until just tender. Cover and let the apples get a bit soft but still hold their shape. Stir every few minutes, and if things get too sticky, a splash of water will save the day.
- Stir in vanilla, then chill your filling. Move the apples and all their syrupy goo onto a tray and cool completely in the fridge or freezer. This step keeps the crust crisp later.
- Prep the crust. Roll out your pie dough, press into the dish, and shape the edges as you like. Chill again—cold dough equals a flaky bottom.
- Preheat your oven. Slide in a baking sheet or stone to heat up. Baking the pie on a hot surface makes the base crisp and avoids sogginess.
- Mix the crumble topping. Combine flour, both sugars, salt, and melted butter. You’ll end up with a sandy, clumpy mix. Stash this in the fridge so it firms up slightly—crumble is best cold.
- Assemble. Pile in the chilled apple mixture, scraping in all the caramelized juices. Scatter the first layer of crumb topping over—enough to cover the apples, but save the rest for later.
- Bake high, then low. Start at a blazing oven to set the crust edge, then lower the temperature so the center and topping get golden without overbaking. Shield the crust edges if they start to brown too quickly.
- Add the second round of crumbs when the time’s right. This staggered topping method keeps half the crumble especially chunky and crackly, not sunken and chewy.
- Let it cool—seriously. A long rest sets the juices and helps the crumble stay crunchy instead of soggy. This is the hardest part, but absolutely worth it.
- Serve with a scoop of ice cream (totally not optional around here) and, if you’re feeling fancy, a drizzle of caramel sauce.
Pro Tips for Perfect Crumble Pie
Keep all your components as cold as possible before baking—especially crucial for the crust and crumble topping. The contrast between a crisp base and gooey filling is pure gold, and chilling is what makes it happen.
Mixing apple varieties keeps the flavor multidimensional and the texture juicy but not mushy. When cooking the filling, don’t wander off. Stir just enough to prevent burning, but don’t overwork the apples—you want them to keep their shape.
Add the crumble in two stages: first to insulate the filling, then again midway through for the crunchiest top. If you see the crust edges browning too quickly, throw together a quick foil collar to protect them. And always let your pie cool completely—those luscious, gooey layers need that downtime.
For storage, this pie holds up nicely at room temperature for a couple of days under a loose cover. Any longer, stash it in the fridge. A quick reheat in the oven revives that topping beautifully.
Pairings and Variations for Your Apple Crumble Pie
Dutch Apple Crumble Pie practically begs for a scoop of vanilla ice cream—classic and unbeatable. A pour of homemade caramel sauce takes things to new heights, especially on chilly evenings.
Want a different vibe? Try adding chopped pecans or walnuts to the crumble before baking. Feeling fruity? Swirl in a handful of cranberries for bright tang, or pears for mellow sweetness. If you’re a cheese lover, a sharp cheddar wedge on the side is one of those quirky, old-school pairings that actually works.
This pie is also a great candidate for holiday meal prep. Bake it the day before and let it rest—flavors get deeper. To freeze, wrap tightly once it’s fully cooled, and reheat straight from the freezer to keep the texture lively.
FAQs about Dutch Apple Crumble Pie
What is the difference between Dutch apple pie and regular apple pie?
Dutch apple pie stands out for its crumbly streusel topping, instead of the double crust used in classic apple pies. The crumble adds a sweet, buttery crunch on top, while the filling is still packed with tender, spiced apples. Some versions also use cooked filling, which makes the texture especially gooey and rich.
Can I make Dutch Apple Crumble Pie ahead of time?
Absolutely—you can prep the pie a day or two in advance. Just let it cool completely before covering and storing at room temperature or in the fridge. When you’re ready to serve, a quick warm-up in the oven will crisp up the topping again.
What are the best apples to use for Dutch Apple Crumble Pie?
A mix of tart and sweet apples gives you the best balance. Try combining Granny Smith (for tang), Honeycrisp (for sweetness and crunch), and Golden Delicious (for soft texture). Mixing keeps your filling from turning mushy or bland.
Can I freeze Dutch Apple Crumble Pie?
Yes, you can freeze it—just make sure the pie is totally cooled first. Wrap it tightly in foil or plastic, then freeze. Reheat straight from frozen in a moderate oven until the filling is bubbly and the topping is crisp.
Final Thoughts on Dutch Apple Crumble Pie
This Dutch Apple Crumble Pie brings together everything you want in a comforting, old-fashioned dessert: crisp crust, gooey apples, and that unbeatable sugary crunch on top. It’s the pie you’ll crave when the leaves change or when you need that little extra boost of warmth and sweetness in the middle of any season.
Once you’ve made it, you might find it’s tough to make any other version again. Share a slice, or keep it all to yourself—either way, it’s pie perfection in every forkful.
More Relevant Recipes
- Irish Potato Bites: These bites are perfect for a cozy gathering, providing comfort food vibes similar to the warmth of apple pie.
- Classic Dublin Style Irish Lamb Stew: This hearty stew pairs wonderfully with the season of apple desserts, offering a rich and comforting meal.
- Irish Beef Stew Dumplings: A comforting dish that complements the cozy, flavorful experience of enjoying a slice of Dutch Apple Crumble Pie.
Dutch Apple Crumble Pie Recipe
Ingredients
Equipment
Method
- Choose your apples. You need 5 pounds of apples for this recipe, which is about 11 large apples. I like to use a mix of apples for the best flavor. For this pie I used Granny Smith, Honeycrisp, and Golden Delicious.
- Make the filling: Use a microplane grater to zest 1/4 teaspoon lemon peel into a 12-inch high sided skillet. The heat should be off.
- Add the juice from half the lemon to the skillet, about 2 tablespoons. Don't use much more than this, you’re not making a lemon apple pie. We just want to wake up the apples a bit and keep them from browning.
- Use a potato peeler or this handy apple peeler to peel the apples. Slice the apples into 1/8 inch pieces. I like to peel and slice one apple at a time so that they don’t get brown: I peel one apple, then stop and slice it, add it to the pan with the lemon juice, and then move on to peeling the next apple. Stir the apples in the pan occasionally to coat everything with lemon juice.
- Once you have all the apples peeled and sliced in the pan, set it over medium heat on the stove.
- Add 1/2 cup packed brown sugar, 1/2 cup granulated sugar, 1/3 cup flour, 1/2 teaspoon kosher salt, 1 and 1/2 teaspoons cinnamon, 3/4 teaspoon nutmeg, and 1/2 teaspoon cardamom (optional). Stir it together gently so you don’t break all the apples.
- Once the mixture is all moistened and you don’t see patches of flour or cinnamon, set a timer for 20 minutes. Cover the mixture completely with a lid, but don’t walk away. Stick around and stir the mixture every 3 minutes or so, replacing the lid each time. Cook for 20 minutes, until the apples are fork tender but still hold their shape.
- Remove the pan from heat and stir in 1 teaspoon vanilla.
- Transfer the apple pie filling (including all the brown caramel gooeyness) to a half sheet pan, or any pan with a lip. Spread the apples all the way to the edges. Cool the apple pie filling completely by placing it in the fridge or the freezer. If you put it in the freezer, it only takes 30 minutes or so.
- Roll out your pie dough and place in a 9-inch pie dish. Fold the edges underneath and crimp them with your fingers and thumbs.
- Place the pie crust in the fridge or freezer for about 30 minutes, for a really flaky crust.
- While the crust and filling are chilling, place a baking sheet or pizza stone in the center rack of your oven and preheat to 425 degrees F.
- Make the sugar crumble: In a medium bowl, add the dry ingredients for the crumble: 1 and 1/2 cups flour, 1/3 cup white sugar, 3/4 cup packed brown sugar, and 1/2 teaspoon kosher salt (use less for table salt). Whisk together.
- In a small bowl, melt 3/4 cup butter (1 and 1/2 sticks). Pour the butter over the dry ingredients and stir together gently. You should end up with a pretty wet sandy mixture with some large clumps. Let it chill in the fridge until you are ready to assemble.
- When the apple pie filling in the freezer is completely cooled, and the pie shell is mostly frozen, take them out of the freezer. Use a rubber spatula to scrape all the chilled apple pie filling into the pie shell.
- Use your hands or a fork to break the crumble into smaller bite size pieces. Top the pie with about a cup or two of the sugar crumble, not all of it! You only want to add enough to cover all the apples, we are not piling it on.
- Bake the pie: Place the chilled pie onto the baking sheet in the oven and let bake for 15 minutes at 425 F.
- After baking at 425 for 15 minutes, reduce the heat to 350 degrees F. Don’t take the pie out of the oven. Just change the temperature. Bake at 350 for an additional 10 minutes.
- At this point, remove the pie from the oven and quickly shut the oven door. Sprinkle the remaining chilled crumble all over the top of the pie. Place the foil on top of the pie crust. This will protect the edges from burning.
- Don’t forget that your oven temperature should be at 350. Place the pie back on the hot baking sheet in the oven and bake at 350 for about 25-35 more minutes.
- You will know the pie is done when the edges of the crust are brown and the crumble is turning a light golden brown in the center.
- Let the pie cool on a wire rack for about 4 hours. I know, this is killer. But if you cut into it now, the juices will be lava hot and way too liquid-y. Your crumble will get wet and soggy sad.
- Once the pie is completely cool, slice and serve! My husband considers it a crime to serve this without vanilla ice cream, and I tend to agree.
- Store the pie on the counter for up to 2 days, covered with plastic wrap or foil. After that transfer it to the fridge.
- See notes for detailed freezing instructions!