Mini Cheesecake Bites: Irresistible Dessert Delights
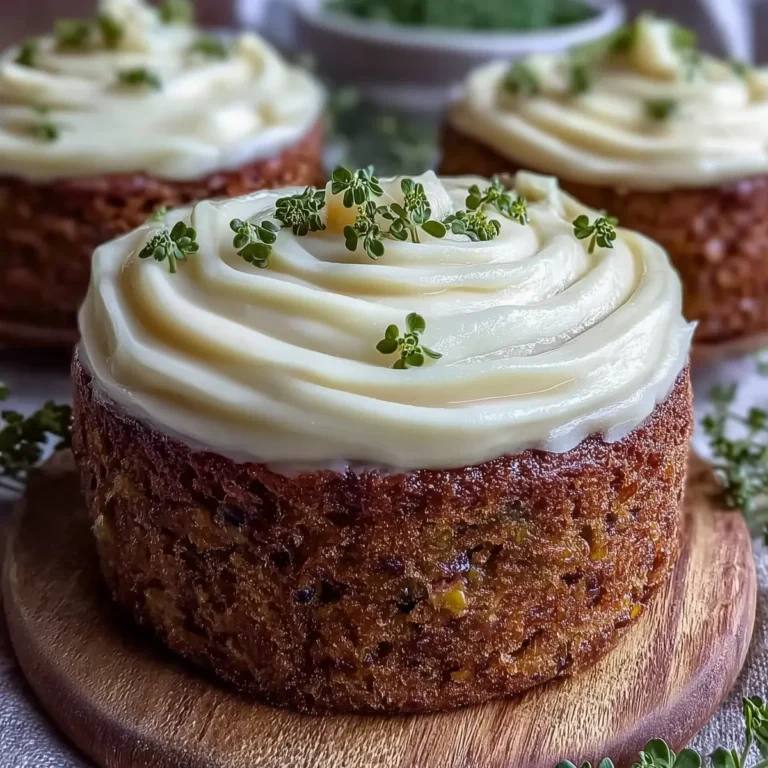
If you’ve ever stared at a dessert table, craving something sweet but not overwhelming, mini cheesecake bites might just be your new go-to. Picture the lush creaminess of classic cheesecake, crafted into tiny, elegant portions perfect for grabbing on the sly at a party—or sneaking from the fridge after midnight. These little gems look impressive, taste indulgent, and don’t leave you in a dessert coma.
I whipped up a batch for a friend’s last-minute birthday, and by the end of the night, there were only stray crumbs left on the platter. The combo of a buttery, sandy crust, rich yet light filling, and fresh fruit or chocolate on top hits every note: creamy, crunchy, tangy, and just the right amount of sweet. Whether you’re hosting, gifting, or just indulging, mini cheesecake bites always steal the spotlight.

Why Mini Cheesecake Bites Are Irresistible
If you’re looking for a dessert that practically disappears the moment you set it out, these mini cheesecake bites check every box. Their size is just right: enough for a decadent treat, but not so hefty you regret it after. They’re shamelessly poppable—party guests hover around the platter, “just taking one more,” and kids adore them (I’ve watched tiny hands sneak seconds and thirds without a word).
What I love is how the little crusts hold their shape, staying crisp and buttery even as the cream cheese layer melts on your tongue. You can bake or go no-bake, making them equally handy for winter holidays or hot summer days when you refuse to turn on the oven. With endless toppings, from vibrant berries to chocolate swirls, every tray turns out a little different and always feels special. Bring these to your next potluck, and you won’t be taking any leftovers home.
What Goes Into These Mini Cheesecake Bites
You don’t need a complicated or expensive ingredient list for show-stopping mini cheesecake bites. Here’s a quick look at what each component brings to the table:
- Graham cracker crumbs or digestive biscuits – The backbone of that classic, sandy-sweet base. Digestives work great if you’re baking outside the U.S., or swap in a favorite crisp cookie for a fun twist.
- Butter – Melted to bind the crumbs and add rich flavor. Unsalted keeps things from tipping too salty.
- Granulated sugar – Provides just a touch of sweetness to both crust and filling and balances any tang from the dairy.
- Cream cheese – The true heart of the recipe. Use it at room temp so your filling comes out silky, not lumpy.
- Sour cream – Lends a gentle tanginess, making the cheesecake creamy but not too dense. Greek yogurt also works for a slightly lighter version.
- Vanilla extract – Warms up the flavor profile, adding mellow depth.
- Lemon juice (optional) – A splash brightens everything; skip it if you’re aiming for a super classic vanilla cheesecake.
- Eggs – These help set the structure if you’re baking. Bring them to room temperature first for a smoother batter.
- Fresh strawberries, blueberries, or cherries – Your fruity crown. They add color, tartness, and that juicy finish.
- Cherry pie filling or fresh cherries – Gorgeous as a topping or folded into a few of the bites for a flavor surprise.
- Chocolate shavings or drizzle – Because what isn’t better with a swipe of chocolate?
See the recipe card below for the full list of ingredients and measurements.
Easy Step-by-Step Guide to Mini Cheesecake Bites
Making these mini cheesecake bites is all about building texture and layering flavors in every little circle. Here’s how you get that bakery-style result at home:
- Mix graham cracker crumbs or biscuit crumbs with granulated sugar and melted butter. Stir until it looks like damp sand that holds together when you pinch it—no dry bits left. Scoop and press this base firmly into your muffin liners, silicone molds, or mini tart pans. Really pack it down so each base is compact and sturdy. Chill these crusts in the fridge while you prep the filling; this step gives you a gorgeous, crisp foundation that won’t fall apart later.
- In a large mixing bowl, beat softened cream cheese and sugar until airy and smooth. Think of a thick, glossy ribbon falling from your beater. Add in the sour cream, vanilla extract, and (if using) that little punch of lemon juice, mixing until just combined—don’t rush, but don’t overbeat. Cracking eggs? Slip them in one at a time, blending on low after each one until silky. Overbeating adds excess air, which can lead to surface cracks, so go gentle here.
- Spoon the creamy cheesecake batter over your chilled crusts, filling each liner almost to the top. Use the back of a spoon or a mini spatula to smooth out the surface—a light hand makes a big difference for that bakery-worthy top. Gently tap the pans or molds on the counter to release any sneaky air bubbles that might lurk underneath.
- If you’re baking, pop the filled pans into a moderate oven until the edges look set and ever-so-slightly puffed, but the center should still jiggle just a little when nudged. That wobble means creamy, not dry! If you’re in the no-bake crowd, skip the oven and let your bites firm up in the fridge instead. Either way, cool them on the counter first, then transfer to the fridge to chill and set fully. This chilling time is non-negotiable for a dreamy, sliceable texture (and makes them easy to lift whole from the molds).
- Once they’re absolutely cold and set, let your creativity loose. Garnish with diced strawberries, plump blueberries, a spoonful of cherry pie filling, or a zigzag of chocolate drizzle. Less is more for toppings; you want every bite to stay dainty and balanced. Serve the cheesecake bites cold for firmness, or let them sit out for 10 minutes to get melty and ultra-creamy.
Tips to Make Your Mini Cheesecake Bites Shine
Mini cheesecake bites are easier than a full-sized cheesecake, but a few little tweaks make all the difference:
Take your time with the crust—really press the crumbs down so they stick together and don’t crumble when you pull a bite from the liner. If your base isn’t holding, add a tiny bit more melted butter.
Soft, room-temperature cream cheese is non-negotiable. Cold cream cheese leads to lumps you’ll never beat out, and nobody wants a gritty filling.
Mix gently once you add the eggs. Beating too hard brings in air, which then expands in the oven and creates cracks up top. If you spot those cracks, don’t stress—a fruit topping covers a multitude of sins.
Don’t rush the chilling step. The filling sets best overnight (even if the fridge is calling your name after just an hour or two). If you try to remove the bites from the molds while they’re warm or even slightly soft, you risk squishing or tearing those perfect edges.
For easy removal, use paper or silicone liners. If you skip liners and use mini tart pans, run a thin knife around the edge before popping them out.
Storing these? Stack them in a single layer in an airtight container. If you need to stack, place a layer of parchment between each level so the toppings don’t smear.
Playful Variations and Fun Ways to Serve
The world of mini cheesecake bites is way bigger than just classic vanilla and berries. Here are some of my favorite spins and ways to make them feel brand new every time:
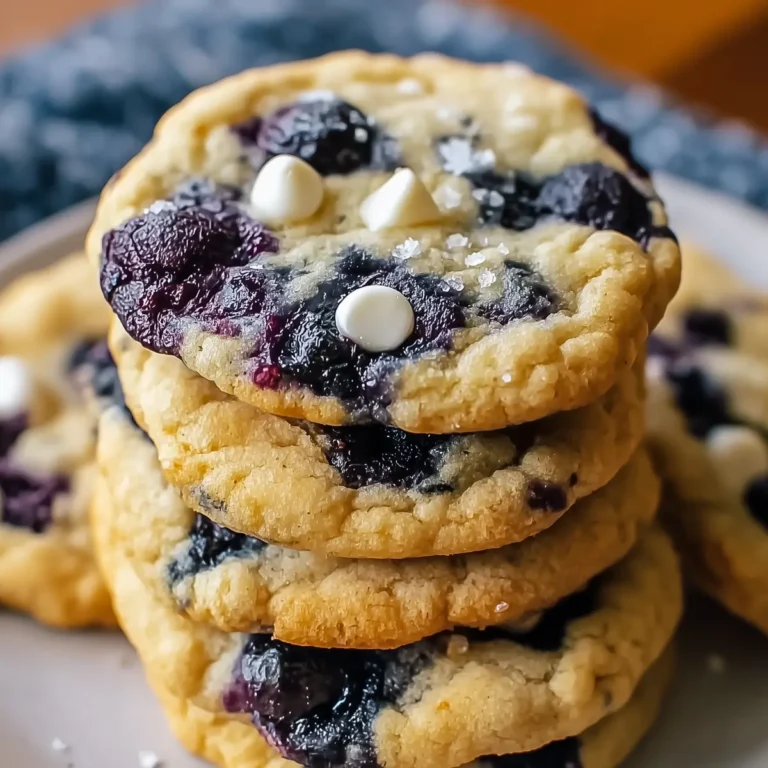
Swap in cookies like Oreos or speculoos instead of the usual graham cracker base for an instant flavor makeover. Chocolate lovers can mix a little cocoa powder into the crust, or drizzle melted dark chocolate over the finished bites for drama.
Go fruity with your toppings—try diced mango and a sprinkle of coconut, or slices of kiwi for something tropical. Prefer nostalgia? Use crushed pretzels for a salty-sweet twist and pipe on peanut butter or caramel.
Make them match the season: pumpkin puree and pumpkin spice in the filling for autumn, or crushed peppermint candies around Christmas.
Serve alongside a sparkling fruit punch, a tart lemony drink, or strong coffee for a gorgeous dessert spread at showers, birthdays, or holidays.
If you want to prep ahead, you can freeze the plain (untopped) bites after they’re fully chilled and firm, then thaw in the fridge overnight and dress them up just before serving. It doesn’t get easier for entertaining.
FAQs about Mini Cheesecake Bites
How long do mini cheesecake bites stay fresh in the fridge?
Mini cheesecake bites keep beautifully chilled in an airtight container for several days. Keep them cold until ready to serve, and wait to add fruit toppings until the last minute so the fruit stays bright and juicy.
Can I freeze mini cheesecake bites for later?
Yes, you can freeze these cheesecake bites after they’ve fully set (skip the toppings first). Arrange in a single layer, freeze until firm, then store in a container with parchment between layers. Thaw in the fridge overnight and top them just before serving for the best texture and look.
Can I make mini cheesecake bites without eggs?
Absolutely! For a no-bake version, simply leave out the eggs and skip the oven step. The filling will set in the fridge and be delightfully creamy. If you’re avoiding eggs for dietary reasons, this is the easiest swap.
What toppings work well on mini cheesecake bites?
Almost anything goes, but classics like fresh berries, cherry pie filling, or a drizzle of chocolate are always hits. For an extra pop, try lemon curd, whipped cream, or a dusting of cocoa powder. Keep the toppings small and light so your bites stay neat and elegant.
Mini cheesecake bites are everything you want in a dessert: creamy, handheld, and endlessly customizable. Whether you’re celebrating or just treating yourself, these little cheesecakes fit right in, bringing a touch of joy (and maybe a little friendly rivalry over the last one). Serve them cold with your favorite topping piled high, and watch them vanish—one smooth, tangy, perfectly portioned bite at a time.
More Delicious Recipes
- Lucky Charms Bars: These no-bake treats bring a fun twist to dessert with a crunchy and sweet marshmallow base, similar to mini cheesecakes in their delightful indulgence.
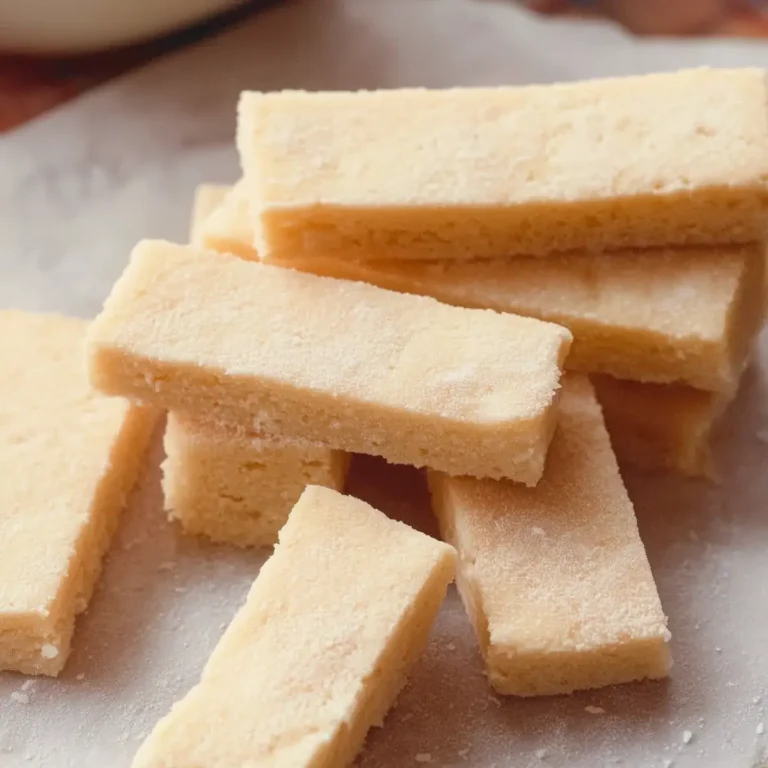
- Irish Shortbread: With a buttery flavor and sandy texture, these cookies provide a perfect cookie counterpart to the rich creaminess of cheesecake bites.
- Irish Scones: These tender, flaky pastries can complement your dessert spread, offering a lovely contrast to the mini cheesecake bites’ creaminess.
Ingredients
Equipment
Method
- In a medium mixing bowl, combine graham cracker crumbs, granulated sugar, and melted butter. Stir until all crumbs are evenly coated and have the texture of damp sand. Press the mixture firmly into the bottoms of muffin liners, silicone molds, or mini tart pans using the back of a spoon or a small measuring cup. Chill the crust in the refrigerator for 10–15 minutes to set while you prepare the filling. This ensures a firm base that won’t crumble when serving.
- In a large mixing bowl, beat the softened cream cheese and sugar on medium speed until smooth and creamy. Add the sour cream, vanilla extract, and lemon juice, mixing until fully combined. Gradually add the eggs, one at a time, mixing just until incorporated. Avoid overmixing, as this can trap air and cause cracks in baked mini cheesecakes. The goal is a silky, lump-free filling with a light yet rich texture.
- Spoon the cheesecake filling evenly over the chilled crusts, filling each mold nearly to the top. Smooth the surface using a small spatula or the back of a spoon. Gently tap the molds on the counter to release any trapped air bubbles, helping the cheesecake set evenly and maintain a smooth top.
- For baked mini cheesecake bites, preheat the oven to 325°F (160°C) and bake for 18–20 minutes. The edges should be set, but the centers remain slightly soft. Let the bites cool completely at room temperature, then refrigerate for at least two hours. For no-bake mini cheesecake bites, skip the oven and place the filled molds directly in the refrigerator for at least two hours until firm.
- Once the mini cheesecakes are chilled and set, top them with your choice of fresh fruit, cherry pie filling, chocolate drizzle, or other garnishes. Keep toppings light to maintain the elegance and bite-sized nature of each piece. Serve chilled for the creamiest texture, or slightly softened for a melt-in-your-mouth experience. Gentle handling ensures that every mini cheesecake bite is perfectly shaped, creamy, and visually appealing.