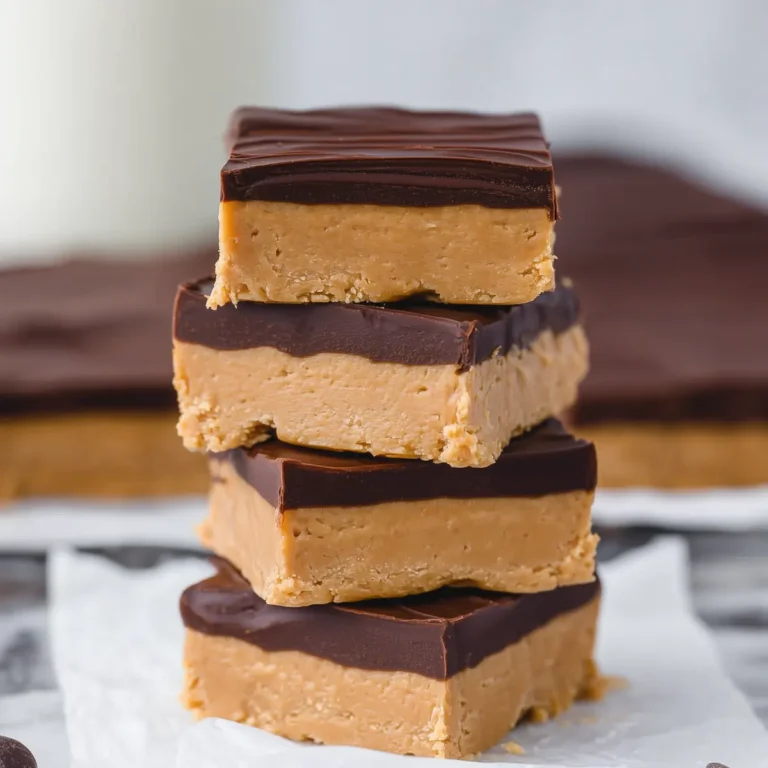
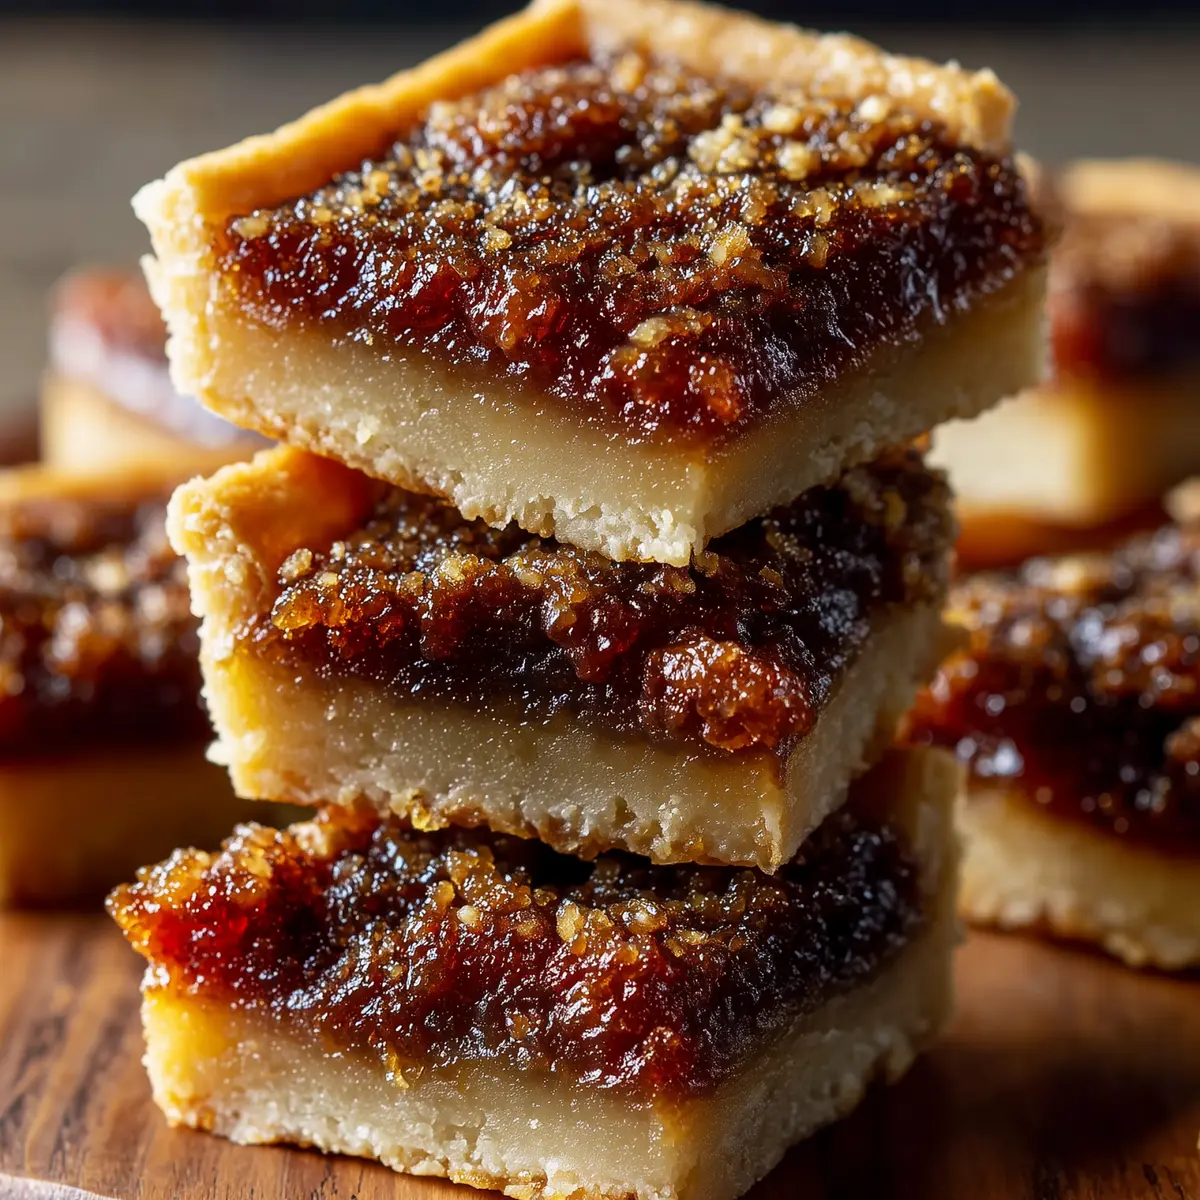
Canadian Butter Tart Squares: Easy and Delicious Dessert
If you’ve been craving that sweet, sticky goodness of a classic butter tart but dread the fuss of making individual pastries, Canadian Butter Tart Squares are about to be your new best friend. You get all the gooey, caramel-sweet magic of the original Canadian treat, but in a format that’s crowd-friendly and just plain easier. These bars come together with no fuss and deliver on that nostalgic, toffee-rich flavor—without the need for a tart pan in sight.
I always keep a recipe like this in my back pocket for those “oh, we have guests coming” afternoons. The scent alone—brown sugar bubbling over a buttery crust—has earned me a few extra friends over the years. Trust me, you’ll want to slice in while they’re still a little warm, letting that golden filling ooze just the right amount.
Why You’ll Love These Butter Tart Squares
If you’re after a dessert that nails the iconic Canadian butter tart flavor without the headache of lining tart pans or fiddling with runny fillings, these squares are the solution. The base is sturdy and flaky, perfectly holding all that gooey, butterscotch-like filling without falling apart in your hands.
They’re just rustic enough for potlucks or picnics but pretty enough for an afternoon tea (or honestly, midnight snacks). With a chewy top, crisp-edged sides, and a hint of nostalgia with every bite, these squares are basically butter tarts made simple—no rolling pins, no precision, just pure comfort.
You’ll find their sweetness balanced by a gentle salty note, with crunchy bits of nut (if you go that route) peeking through like secret treasure. And because you bake the whole batch at once and slice to share, cleanup is basically a breeze.
Ingredient Breakdown for Canadian Butter Tart Squares
Let’s break down what makes the layers in these Canadian Butter Tart Squares come alive:
- Flour: keeps the crust tender and forms the foundation; you can swap for a gluten-free blend.
- Unsalted butter: the secret to rich flavor in both the crust and gooey top layer.
- Granulated sugar: adds sweetness and helps the crust develop just the right subtle snap.
- Brown sugar: offers deep, caramel flavor, making the filling impossibly rich and luscious.
- Corn syrup: ensures the classic sticky-sweet texture that you expect from real-deal butter tarts.
- Eggs: give the filling its signature custardy set and help hold everything together.
- Vanilla extract: rounds out the flavors with warmth and depth; real vanilla makes all the difference.
- Walnuts or pecans: optional, but bring crunch and a nutty dimension to every bite.
- Salt: marries the sweet and savory, keeping things from going overboard.
See the recipe card below for the full list of ingredients and measurements.
Easy Ingredient Swaps for Butter Tart Squares
No need to stress if your pantry isn’t fully stocked. For a gluten-free treat, go with a reliable cup-for-cup gluten-free flour. Nut free? Just leave out the nuts entirely; the bars will still be deliciously gooey. If you don’t have corn syrup, golden syrup will bring a slightly deeper note, or try maple syrup for a classic Canadian twist.
Prefer a dairy-free dessert? Swap the butter for a good-quality dairy-free baking stick or coconut oil, and you’ll get plenty of flavor without the lactose. You can even add a hint of orange zest or sprinkle in chocolate chips to send these butter tart bars in a more decadent direction—don’t be afraid to get creative!
How to Make Canadian Butter Tart Squares: Step by Step
You’re about to unlock that signature Canadian dessert vibe, and it’s all simpler than it sounds. No tart pans or waiting around for complicated steps—just straightforward, satisfying baking.
- Preheat your oven, and line a square baking pan with parchment, letting extra hang over the sides. This trick makes lifting your squares out a total breeze later.
- In a mixing bowl, combine your flour and sugar, then use a fork or pastry cutter to blend in the softened butter until you get a mixture that looks a bit like coarse breadcrumbs—think shortbread, but even easier.
- Press this mixture firmly and evenly into the bottom of your prepared pan, smoothing it out so the crust bakes up golden and sturdy. Pop it in the oven until you see the palest hint of gold across the surface.
- Meanwhile, in a separate bowl, whisk together the brown sugar, corn syrup, melted butter, eggs, vanilla, and salt.
If you’re adding nuts, now’s the time to fold them in gently so they’re scattered through each slice. - When the crust comes out hot, pour the filling overtop—don’t worry if it seems a bit runny, it’ll set up beautifully once baked.
- Slip the pan back into the oven and keep an eye out for small bubbles and a set, glossy top. The aroma at this stage should be deep, buttery, and mouthwatering.
- Once baked, let the pan cool completely on a wire rack. That patience pays off: it makes sure the filling holds its shape when you slice into neat squares.
- Lift out the slab using your parchment paper and cut into bars. You get crisp edges and a gooey center in every bite—exactly what butter tart dreams are made of.
Butter Tart Bar Tips for Baking and Storing
If you want the cleanest slice and perfectly gooey interior, let your Canadian Butter Tart Squares cool all the way to room temperature before you touch that knife. Even a quick chill in the fridge helps firm up the filling if you’re short on time.
Use parchment with a few extra centimeters of overhang on the sides—this allows you to lift the whole tray right out with zero sticking. When you cut the squares, use a sharp, thin-bladed knife, cleaning it between slices for the neatest presentation.
For storing, seal the squares in an airtight container, and they’ll keep their soft and chewy bite for a few days at room temperature. Pop them in the fridge if you want them to last into the weekend. They’re also freezer-friendly: layer between sheets of parchment, tuck in a freezer bag, and thaw whenever the craving hits.
Pairings and Creative Variations
These bars are absolute crowd-pleasers all by themselves, but pairing takes them over the top. Serve with a scoop of vanilla ice cream, a mound of whipped cream, or a drizzle of caramel sauce for extra luxury. If you’re having a coffee break, their sweetness is just what you want with a mug of dark roast or a piping hot cup of tea.
To change things up, add a scattering of dried currants or raisins to the filling for a more “old-school” bakery feel. Swirl in some melted bittersweet chocolate, or even spike the filling with a touch of bourbon or maple extract for depth. If you feel playful, try baking in mini muffin tins for cute, bite-sized butter tart treats.
Whether you want to keep it classic or experiment, there are endless ways to make these Canadian Butter Tart Squares your own.
FAQs about Canadian Butter Tart Squares
Can I make Canadian Butter Tart Squares ahead of time?
Yes, these squares do great when prepared a day or two in advance. Just store them in an airtight container once fully cooled, and they’ll stay moist and delicious.
Do I have to use nuts in my butter tart squares?
No, nuts are completely optional and the bars taste great either way. They add crunch, but leaving them out creates a smooth, classic filling.
Why is my filling runny or too firm?
A runny filling often means they didn’t bake long enough, while overbaking can make the filling too hard. Bake until the center just sets and the top is glossy for best results.
Can I freeze these butter tart bars?
Absolutely—Canadian Butter Tart Squares freeze very well. Layer with parchment, seal in a freezer bag, and thaw at room temperature before serving.
Final Thoughts on Canadian Butter Tart Squares
Canadian Butter Tart Squares bring all the buttery nostalgia of the original tart into a shareable, easy-to-make treat. Their gooey filling and flaky base are a surefire way to make any dessert table just a bit more special.
So if you’re ready for a sweet baking project that fits any occasion—from quick coffee breaks to cozy gatherings—you’re going to find yourself coming back to these bars again and again.
More Delicious Recipes
- Lucky Charms Bars: These sweet, chewy bars are perfect for satisfying your cravings for something sugary and nostalgic.
- Irish Shortbread: Enjoy the simple, buttery flavors similar to those in the buttery crust of the butter tart squares.
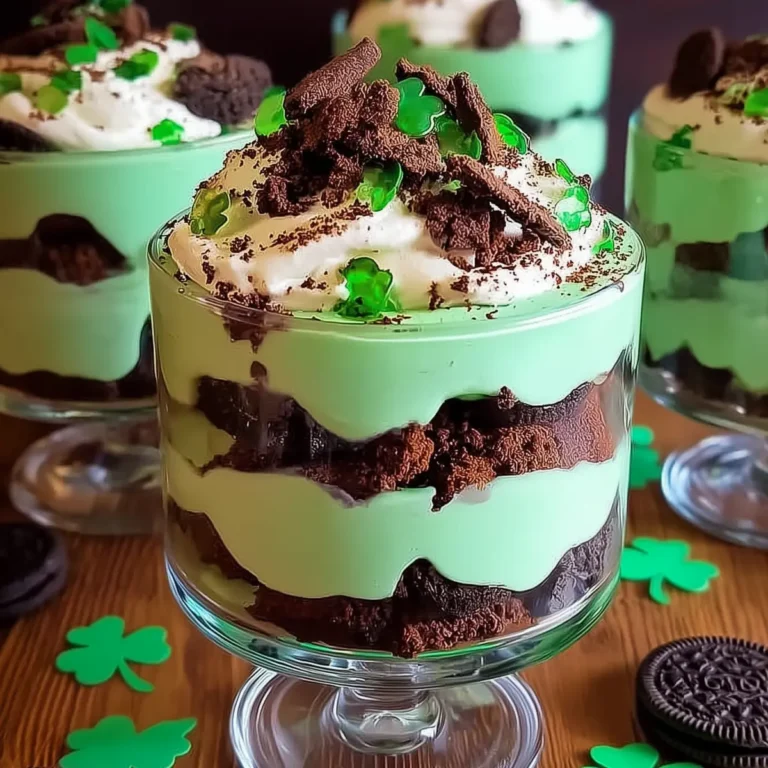
- St. Patrick’s Day Brownie Trifle: This layered dessert is a fun way to celebrate, featuring rich brownie pieces and creamy layers that complement sweet treats beautifully.
Canadian Butter Tart Squares
Ingredients
Equipment
Method
- Preheat oven to 350°F (175°C). Line an 8x8-inch baking pan with parchment paper, leaving an overhang for easy removal.
- In a mixing bowl, combine flour and granulated sugar. Add softened butter and mix until mixture forms coarse crumbs.
- Press the crumb mixture evenly into the bottom of the prepared pan. Bake for 15 minutes until lightly golden.
- While the crust bakes, whisk together brown sugar, corn syrup, melted butter, eggs, vanilla extract, and salt in another bowl.
- If using, fold chopped nuts into the filling mixture.
- Pour the filling evenly over the hot crust once removed from the oven.
- Return pan to the oven and bake for 15-20 minutes, until the filling is set and bubbling.
- Remove from oven and cool completely on a wire rack.
- Lift parchment paper to remove squares from the pan, cut into 12 pieces, and serve.